Update the firmware using the CLI
If you have physical access to Connect Tank, you can use the CLI to update the firmware.
- Download the Connect Tank
Go to the Connect Tank product support page.
From the Product Support tab, click Firmware.
Download and install the firmware file.
-
Open the enclosure and make sure the battery is connected and the SIM card is installed.
- Connect a USB type A to B cable from your computer to the USB type B port.
Note Do not use the mini USB port, which is covered by a red X in the graphic below.
-
You may need to install device drivers or wait for your computer to automatically install them when connecting Connect Tank to a computer using a USB cable. Digi recommends drivers available at www.ftdichip.com/Drivers/VCP.htm.
Open a terminal program on a computer and connect to Connect Tank using the following configuration: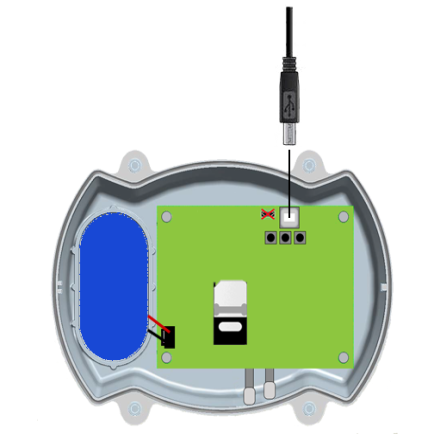
- Connection port: Connect to the COM port associated with the USB cable connected to Connect Tank
- Baud rate or bits per second: 115200
- Data: 8 bit
- Parity: None
- Stop: 1 bit
- Flow control: None
- Press the Wake button. The command prompt appears in the terminal program window.
- In the terminal program:
- Type fwupdate at the command prompt and select the YMODEM protocol to send the firmware file to the device. Refer to your terminal program documentation for how to use the YMODEM protocol.
- Press Enter. The device remains awake to load and install the firmware update. After the device completes the change, it sends its updated status information to Remote Manager.
- Press the Wake button and type status at the command prompt to verify the firmware version.
 PDF
PDF


