Step 3 : Install the AnywhereUSB Manager
The AnywhereUSB Manager is a separate application that you use to configure and manage the USB ports included in the AnywhereUSB Plus. The two USB ports on the AnywhereUSB Plus act as an AnywhereUSB 2 Plus Hub.
The Anywhere USB Manager software must be downloaded from the Digi support site and installed on your computer. After the software installs, the AnywhereUSB Manager launches and automatically discovers
CAUTION! Only a Windows Administrator can perform the software install. If you are logged in as a non-Windows Administrator user and you attempt to install the software, you will be required to enter Windows Administrator login credentials to be able to complete the installation process.
Note You can also install the AnywhereUSB Manager on the AnywhereUSB 2 Plus and AnywhereUSB 8 Plus using Linux and additional methods. See AnywhereUSB Manager reference for a complete list of installation methods and instructions.
Prerequisites
Before you begin, you should determine the following:
-
Mode: Decide whether you want to run the AnywhereUSB Manager as a stand-alone or as a service. For detailed information, see Step 2: Determine AnywhereUSB Manager mode: Service or stand-alone.
-
Client ID: A client ID is required during the AnywhereUSB Manager installation. The client ID is associated with the login credentials for the user currently logged on to the computer, and is used by your computer and the Hub to create a connection. See Client ID overview for more information.
To install the AnywhereUSB Manager:
-
Download the AnywhereUSB Manager installer from the AnywhereUSB Drivers section of the support page.
- Navigate to the AnywhereUSB Plus support page.
Note This link takes you to the AnywhereUSB 2 Plus drivers page, but the driver options are the same for all AnywhereUSB Plus models.
- Click the Product Resources tab. This should be selected by default.
- In the Drivers & Patches section, click the AnywhereUSB Manager link.
- From the drop-down list box, select Microsoft Windows.
- Click the download link for the version of the installer than you want to download. Make a note of the version number for future reference.
Note You should save the downloaded software to your computer before you start the install process. This is useful if you decide to uninstall the AnywhereUSB Manager in the future.
- Navigate to the AnywhereUSB Plus support page.
- Right-click on the downloaded software and select the Run as Administrator menu option.
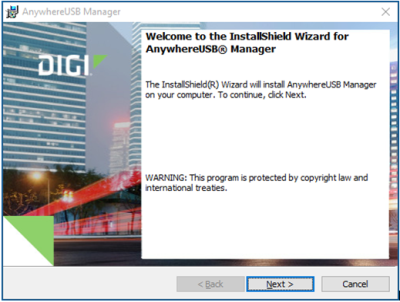
- Enter your Administrator login credentials. The AnywhereUSB Manager installation wizard launches.
-
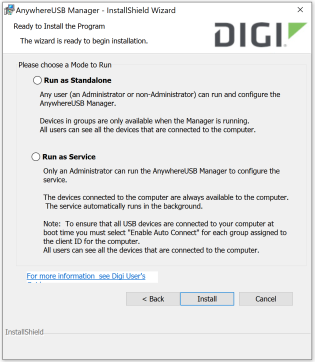
Click Next. The Ready to Install screen appears. You must specify which mode you want to install: Standalone or Service. For detailed information about each mode, refer to Step 2: Determine AnywhereUSB Manager mode: Service or stand-alone.
- Click Install. A status bar shows the progress of the installation process. When complete, the Completed screen appears.
- The options in the Completed screen are selected by default. De-select the option if you do not want to use the feature.
- Launch AnywhereUSB Manager: Launch the AnywhereUSB Manager when the installation completes.
- Run AnywhereUSB Manager at Logon: Automatically launch AnywhereUSB Manager each time you log in to your Windows user account. Digi recommends that you do not de-select this option.
Note If you have installed the Manager as a service, this option applies only to the current admin user. Each time this admin user logs in, the Manager launches so the user can administer the service. If a non-admin user logs in, the service is available, but the AnywhereUSB Manager does not display.
![]()
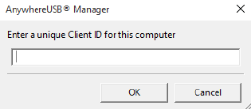
- Click Finish. The client ID confirmation dialog appears.
- Stand-alone: If you installed the Manager in stand-alone mode, the client ID confirmation dialog looks like this:
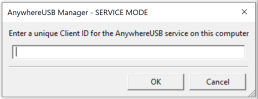
- Service: If you installed the Manager in service mode, the client ID confirmation dialog looks like this:
- Stand-alone: If you installed the Manager in stand-alone mode, the client ID confirmation dialog looks like this:
- Enter a unique client ID. This client ID is associated with the login credentials for the user currently logged on to the computer. See Client ID overview for more information about how the client ID is used by your computer and the Hub to create a connection.
- Click OK. If the Launch AnywhereUSB Manager was selected, the AnywhereUSB Manager launches.
NEXT STEP: If you are performing the initial device set-up, proceed to the next step: Step 4: Connect the power supply.
 PDF
PDF


