Follow these steps to set up your ConnectCore 6 SBC hardware:
| Connections vary slightly based on SBC version. See Identify the ConnectCore 6 SBC version. |
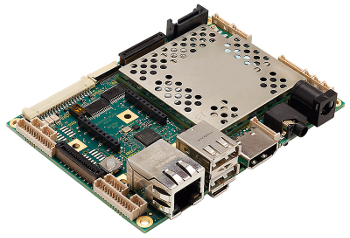
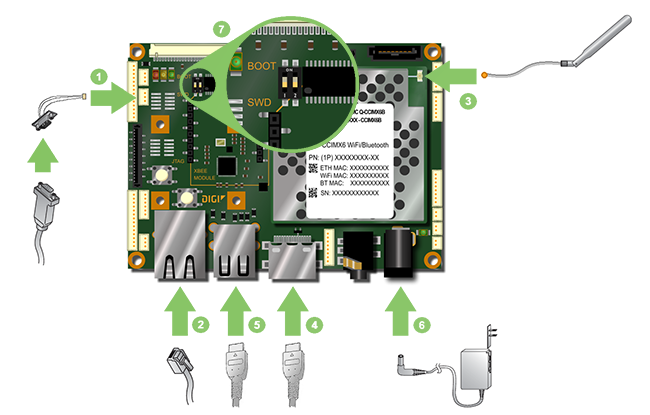
ConnectCore 6 SBC version 3
-
Connect the serial adapter cable to the console port [CONS]. Then connect a serial cable from the adapter to the development computer.
-
Connect the Ethernet cable (not included) to the Ethernet port.
-
Connect the antenna to the UFL connector.
-
Connect an HDMI cable (not included) to the HDMI connector and then to an HDMI-compatible display.
-
Connect a USB mouse to the USB connector.
-
Add the appropriate plug and connect the power supply.
-
Ensure the BOOT micro-switches are both in the down position.
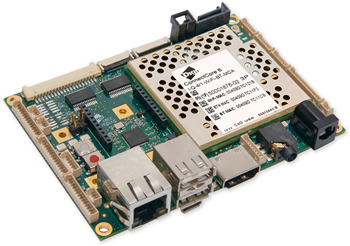
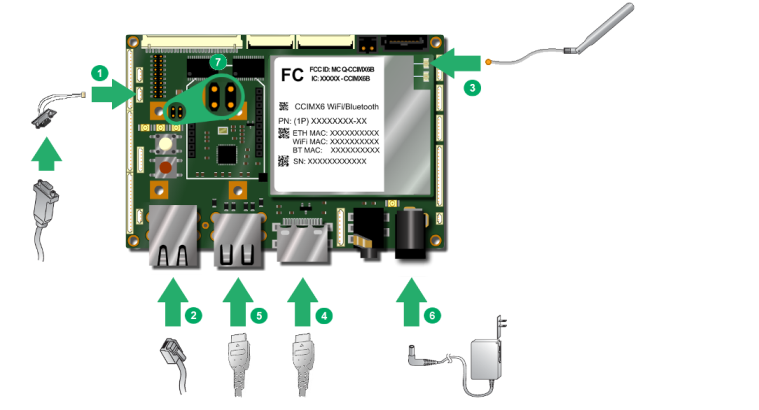
ConnectCore 6 SBC version 1
-
Connect the serial adapter cable to the console port [CONS]. Then connect a serial cable from the adapter to the development computer.
-
Connect the Ethernet cable (not included) to the Ethernet port.
-
Connect the antenna to the UFL connector.
-
Connect an HDMI cable (not included) to the HDMI connector and then to an HDMI-compatible display.
-
Connect a USB mouse to the USB connector.
-
Add the appropriate plug and connect the power supply.
-
Ensure the BOOT jumpers are both open.
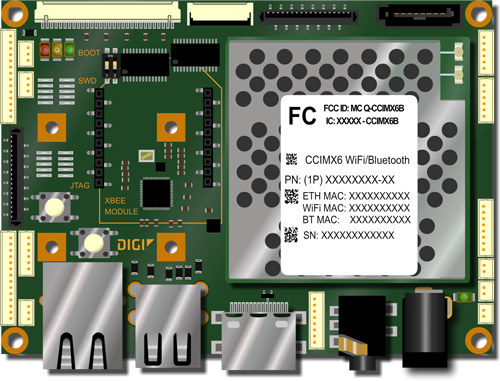
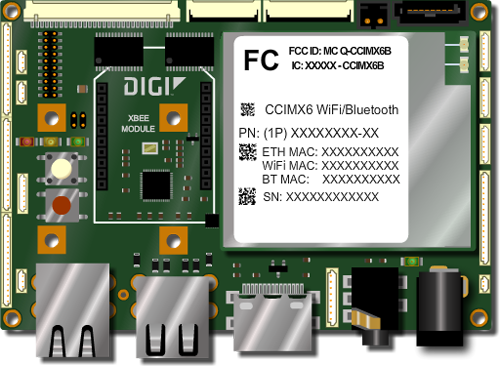
Identify the ConnectCore 6 SBC version
The ConnectCore 6 JumpStart Development Kit includes the latest SBC revision, version 3. Although the kit works for all SBC revisions, the older revision has small differences in placement. The following table will help you to identify which version you have.
| ConnectCore 6 SBC version 3 | ConnectCore 6 SBC version 1 |
|---|---|
|
|
|
|