

This tutorial demonstrates how to develop and launch your first Android application in the device. The application allows you to blink a device LED on and off.
Before creating your project, make sure your device is correctly connected, powered, and running. Once your device is ready for development, follow these steps:
1. Install the software
You must have the following software components in order to start developing Android applications for your device:
| If you already have Android Studio 2020.3.1 or later in your computer, you can skip the first two installation steps and go directly to Digi Extensions for Android Studio. |
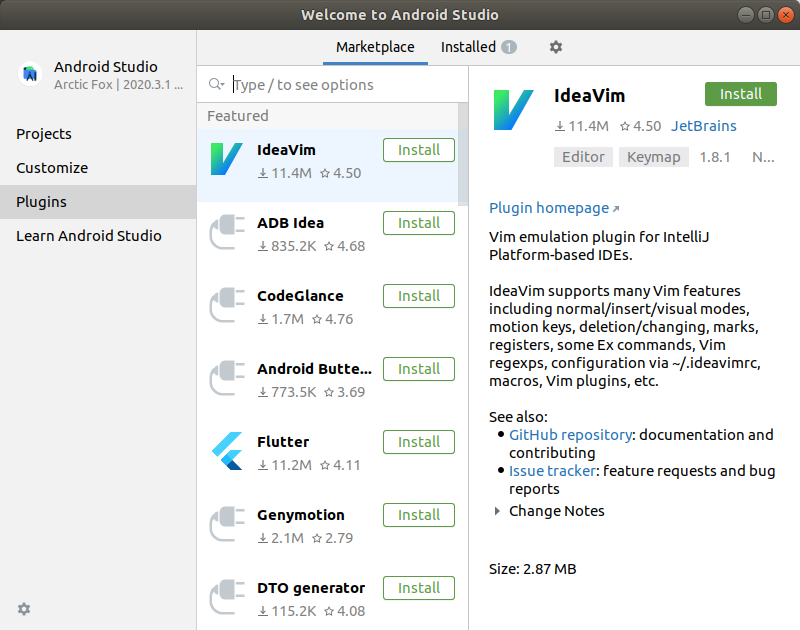
1.1. Android Studio
Android Studio provides everything you need to start developing apps for Android.
To download and install Android Studio on your computer:
-
Download the latest Android Studio at http://developer.android.com/sdk/index.html.
-
Follow the steps for installing Android Studio at https://developer.android.com/studio/install.
| Digi Embedded for Android has been validated with Android Studio 2020.3.1, although newer versions should also work. You can download this version from https://developer.android.com/studio/archive. |
1.2. Digi Extensions for Android Studio
To download and install the Digi Extensions on your Android Studio:
-
Open Android Studio.
-
Open the Plugins dialog by doing one of the following:
-
Select Plugins on the Welcome screen.
-
Or open the Settings dialog:
-
Select File > Settings from the menu.
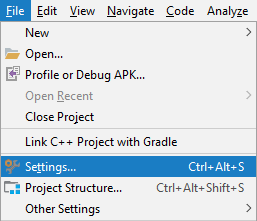
-
Select Plugins from the tree on the left of the Settings dialog.
-
-
-
Click Marketplace tab at the top of the page.
-
In the Search box field, type Digi and press Enter. The Digi Extensions for Android Studio plugin should be listed:
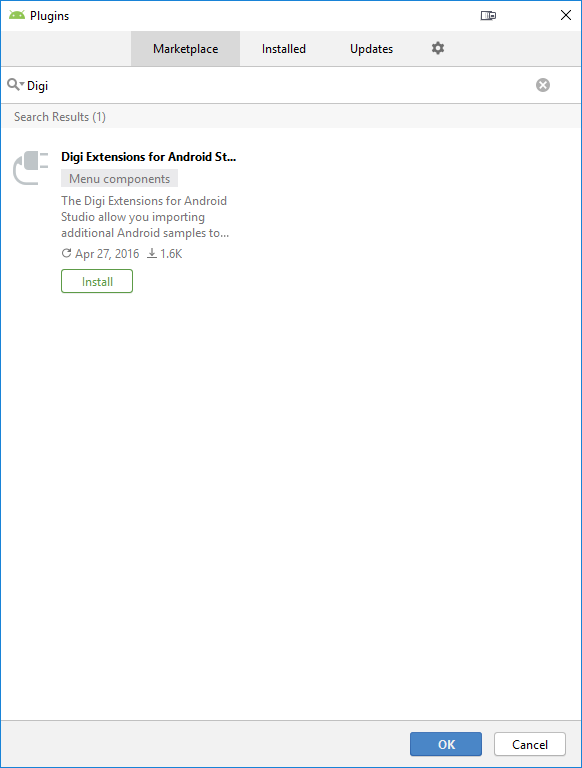
-
Click Install button below the plugin description.
-
Once the install process finishes, click Restart IDE button to activate the plugin. Or close the IDE.
-
When a message appears asking you to restart, click Restart .
1.3. SDK Add-on
You are now ready to start developing Android applications. The Get started section provides an initial tutorial, while the Application development section gives you everything you need to start using the Digi APIX for Android to create more advanced apps.
-
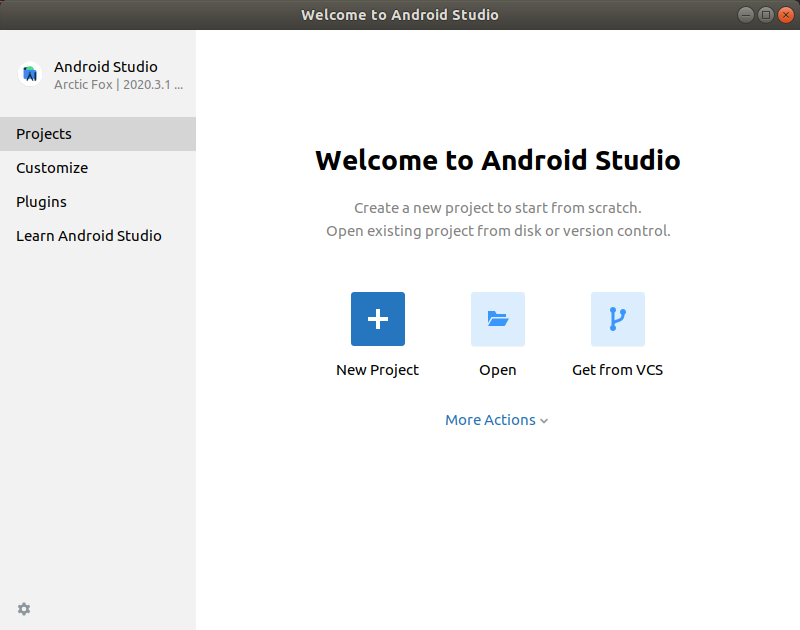
On the Android Studio Welcome screen, click Customize on the Quick Start panel and then All settings.
-
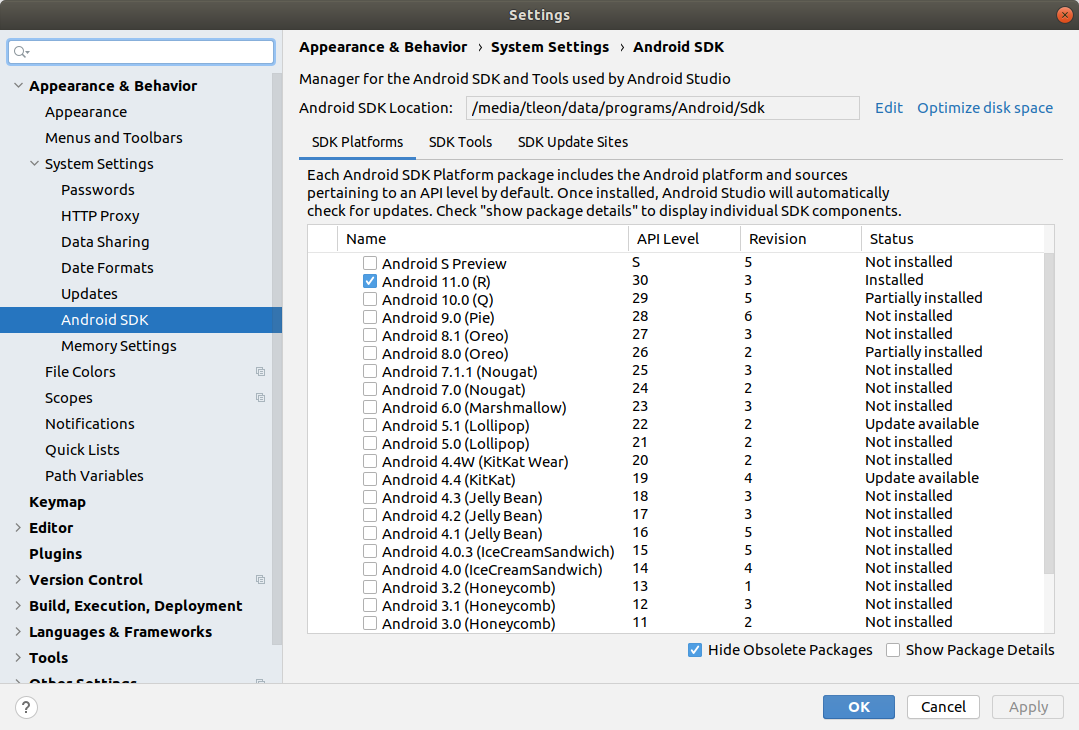
Then click SDK Manager located inside Appearance & Behavior > System Settings. The SDK Manager dialog opens.
-
Select the SDK Update Sites tab and click the + button at the right to add a new add-on site.
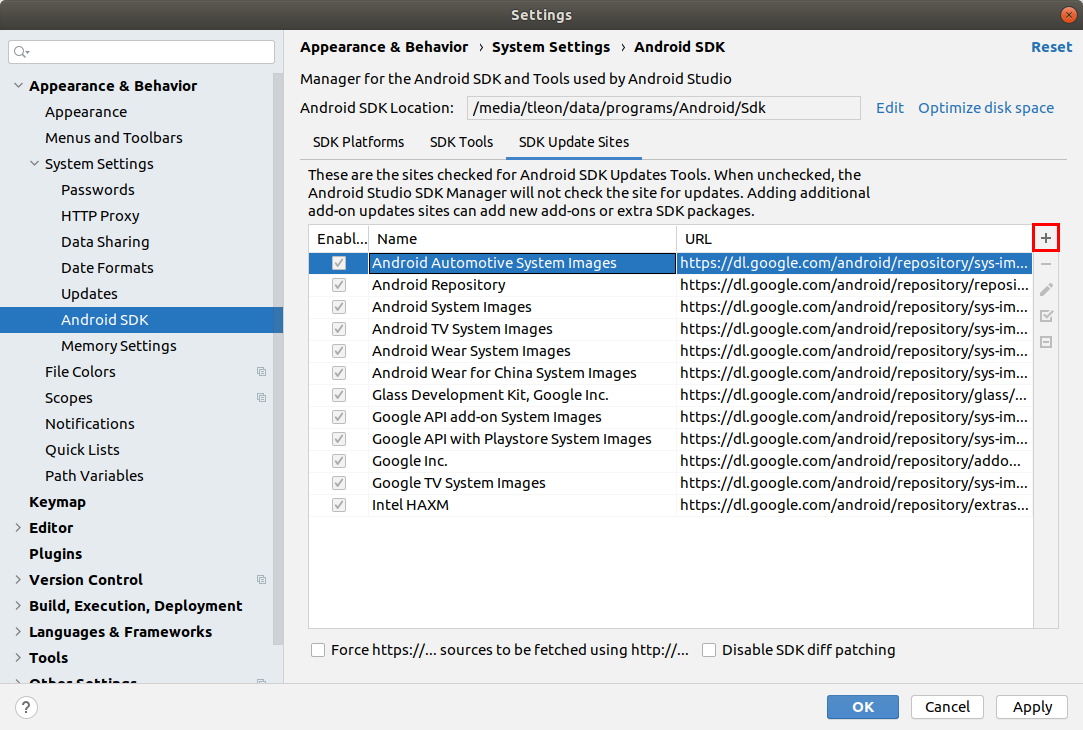
-
Enter a name for the new add-on site and use the following URL: http://ftp1.digi.com/support/android/sdk_addon/11.0/addon.xml
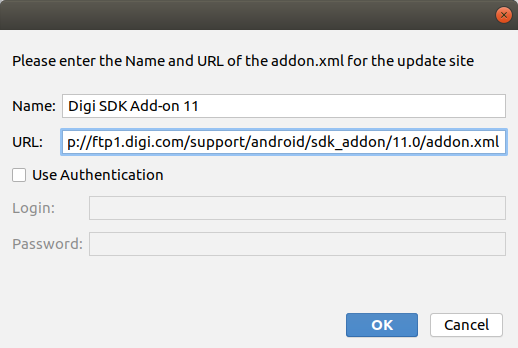
-
Click OK.
-
Go back to the SDK Platforms tab and click Apply.
-
Check Show Package Details to expand and list all the available Android packages for each version. A new package named Digi SDK Add-on for Embedded appears under Android 11.0 (R).
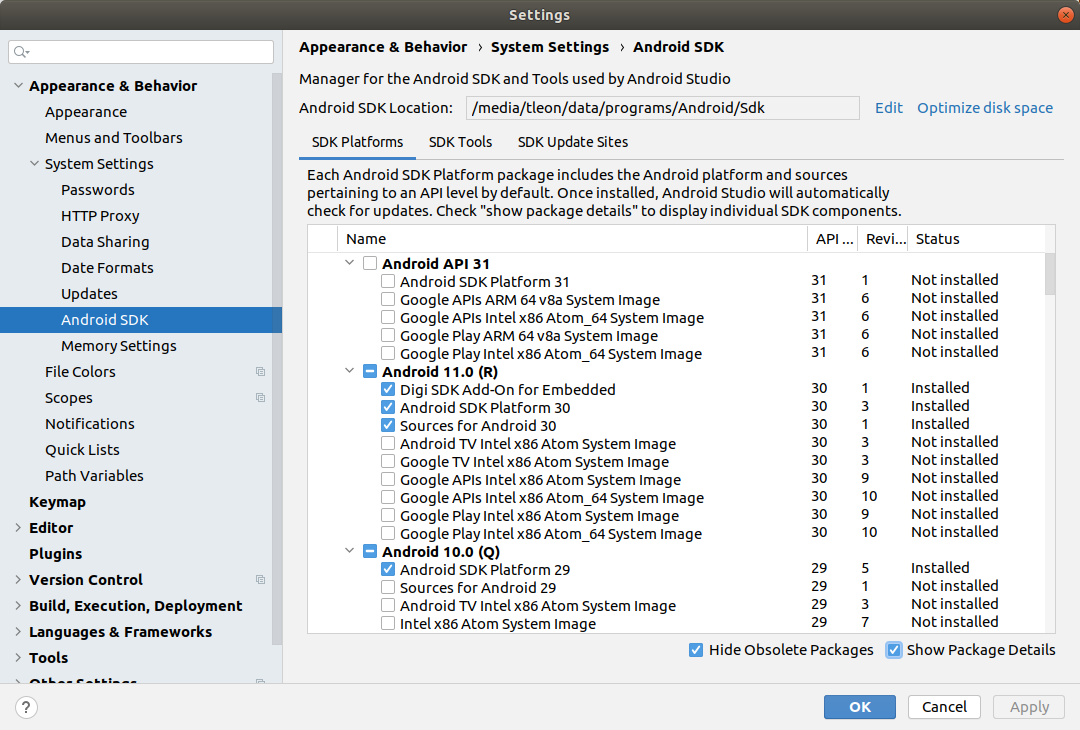
-
Check the new package and click Apply.
Make sure you have also checked Android SDK Platform 30 under Android 11.0 (R) as it is required to build applications for the Android target platform. -
A confirmation dialog appears listing the packages that will be installed. Click OK.
-
Accept the License Agreement and click Install.
-
Once installation is complete, click Finish and close the SDK Manager.
-
Restart Android Studio.
You are now ready to develop Android applications using the Digi APIX for Android.
| To uninstall the add-on in the future, please read the Uninstall the Digi SDK Add-on for Embedded topic. |
1.4. Google USB driver
You need the Google USB Driver for Windows if you want to perform adb (Android Debug Bridge) debugging with your device from a Windows workstation.
-
Download the Google USB driver at http://developer.android.com/sdk/win-usb.html.
-
Once you have downloaded the USB driver, perform the following instructions to install it, based on your Windows version:
| If you are developing with a Linux workstation this is not required. |
To install the Google USB driver on Windows 7 or later for the first time:
-
Unzip the downloaded file.
-
Connect your Android-powered device to your computer’s USB port.
-
Right-click on Computer from your desktop or Windows Explorer, and select Manage.
-
Select Device Manager in the left pane of the Computer Management window.
-
Locate and expand Other device in the right pane.
-
Right-click the device name and select Update Driver Software to launch the Update Driver Software wizard.
-
Select Browse my computer for driver software and click Next.
-
Click Browse and locate the USB driver folder, called
usb_driver, which appears after you decompress the downloaded file. -
Click Next to install the driver.
To install the Google USB driver on Windows Vista for the first time:
-
Unzip the downloaded file.
-
Connect your Android-powered device to your computer’s USB port. Windows detects the device and launches the Found New Hardware wizard.
-
Select Locate and install driver software.
-
Select Don’t search online.
-
Select I don’t have the disk. Show me other options.
-
Select Browse my computer for driver software.
-
Click Browse and locate the USB driver folder, called
usb_driver, which appears after you decompress the downloaded file. -
Click Next. Vista may prompt you to confirm the privilege elevation required for driver installation. Confirm it.
-
When Vista asks if you’d like to install the Google ADB Interface device, click Install to install the driver.
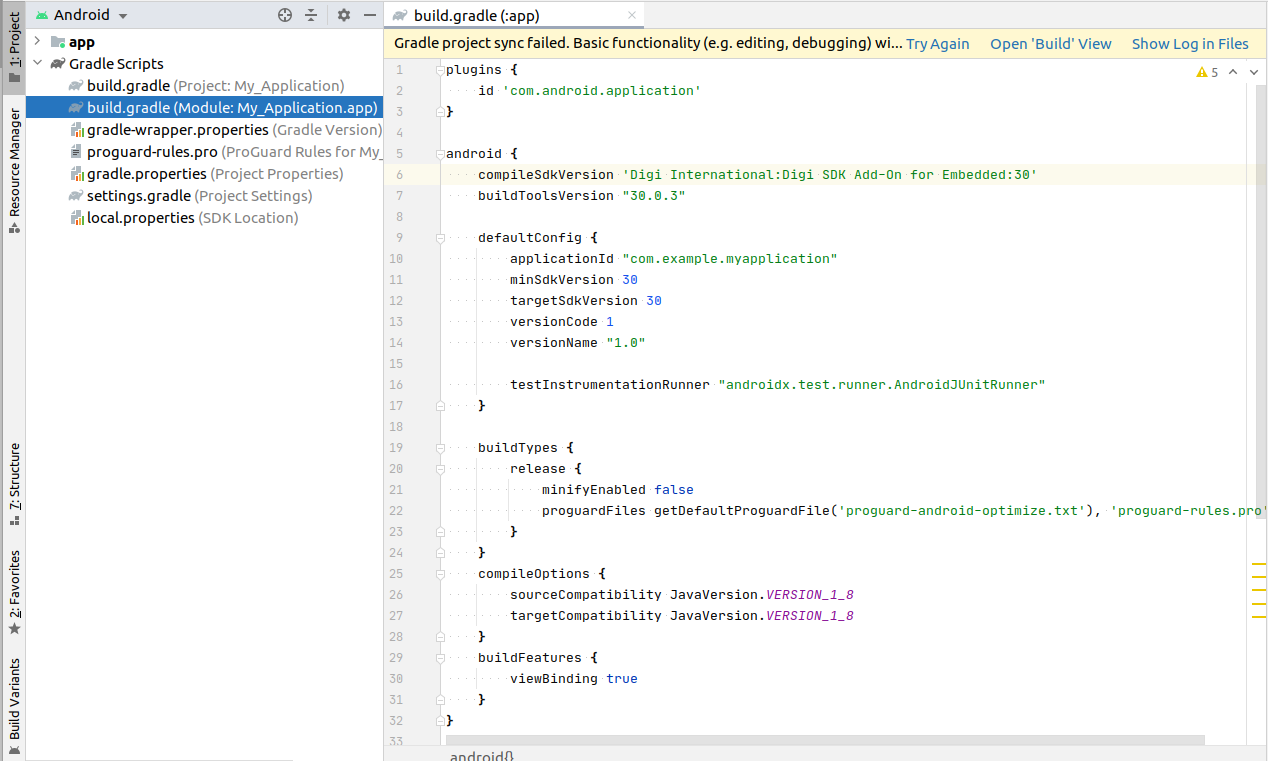
2. Create the Android application
-
Open Android Studio.
-
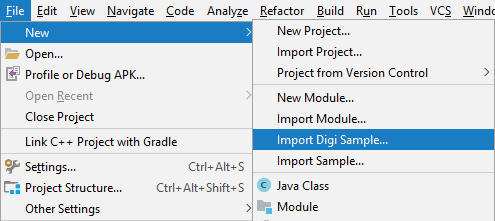
Open the Import Digi Sample wizard by doing one of the following:
-
Select More Actions > Import a Digi Android code sample on the Welcome screen.
-
Select File > New > Import Digi Sample from the menu.
-
-
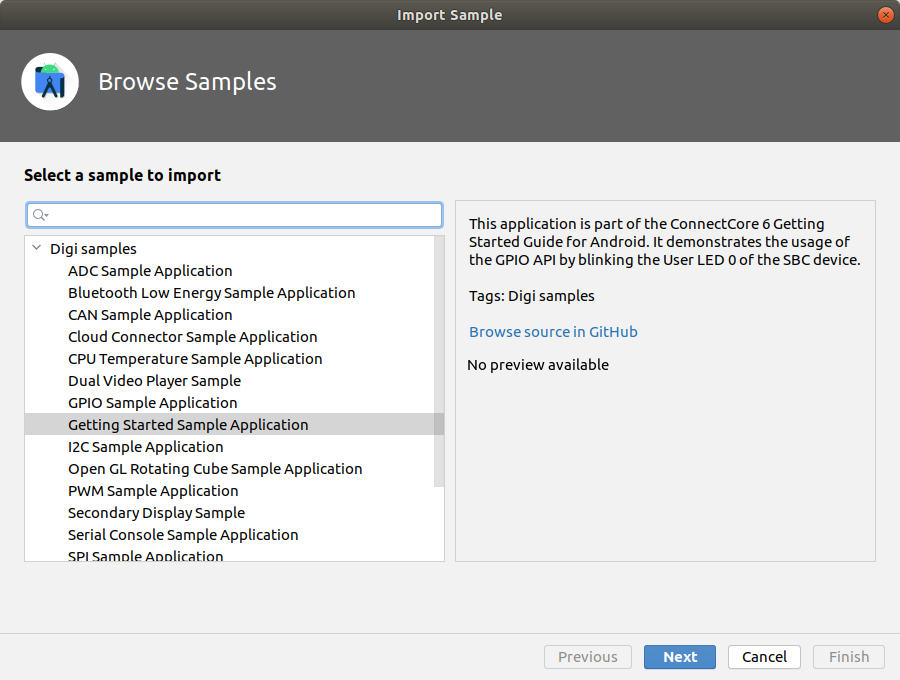
On the Browse Samples page of the wizard, select the Getting Started Sample Application under Digi samples.
Then click Next.
-
In the Project location field of the Sample Setup page of the wizard, specify the path where you want to download the sources of the application.
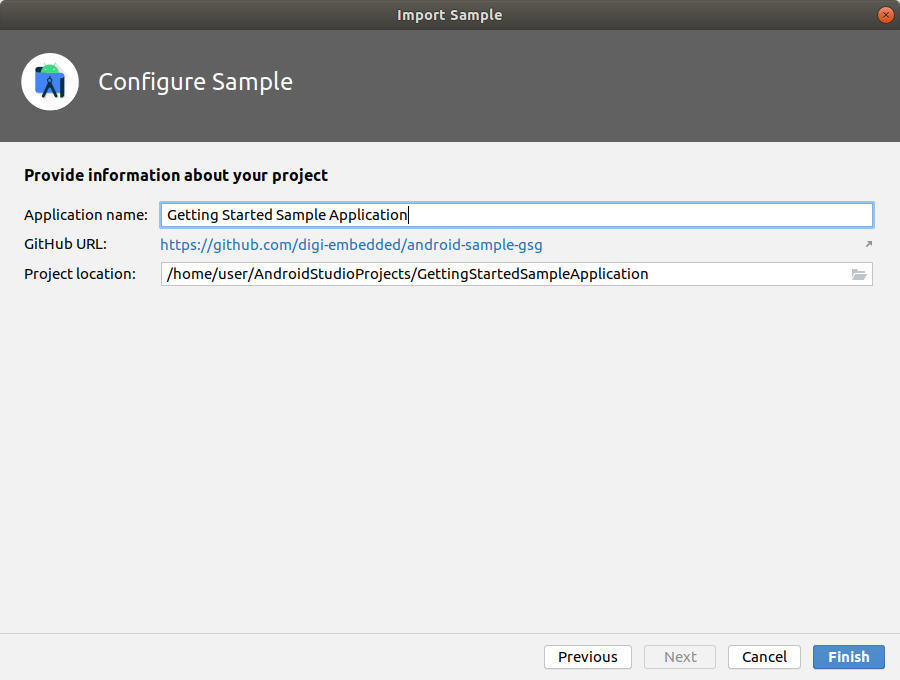
-
Click Finish to create the sample application. A new Android Studio window opens with the Getting Started Sample Application project.
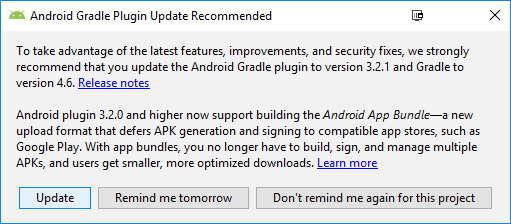
Sample applications are configured to use a specific version of the Gradle plugin that has been validated. New versions of Android Studio may ask you to update sample applications to the latest Gradle plugin. Doing so will cause sample applications to stop building properly. Digi recommends you do not update sample applications to the latest Gradle plugin.
|
Android Studio does not automatically update examples to the latest version. Examples may need to be modified to work with newer versions of Android Studio than the one tested with this release. By default, all sample applications are configured to run with the latest released version of the Digi SDK Add-on for Embedded. If you are using an Android version different than the latest released one, you might need to properly configure the sample application before running it in your platform. To do so, follow these steps:
|
3. Launch the Android application
Once you have created the project, you can launch it in your Android device:
-
Ensure the device is connected to the development computer using a USB type-C cable. Use the USB type-C connector of the device for this purpose.
-
Ensure the device has developer and debugging options enabled. See Enable developer options and debugging for more information.
-
Select Run > Run 'app'.
-
If the Device Chooser dialog opens, select your device and click OK.
If your device appears as Unauthorized in the Device Chooser dialog, go to your Android device. A dialog shows up on your device, presenting an RSA key for your computer and asking for confirmation to accept the connection.
Select Always allow from this computer and click OK.
After accepting your computer RSA key, the device state changes to Online in the Device Chooser dialog.
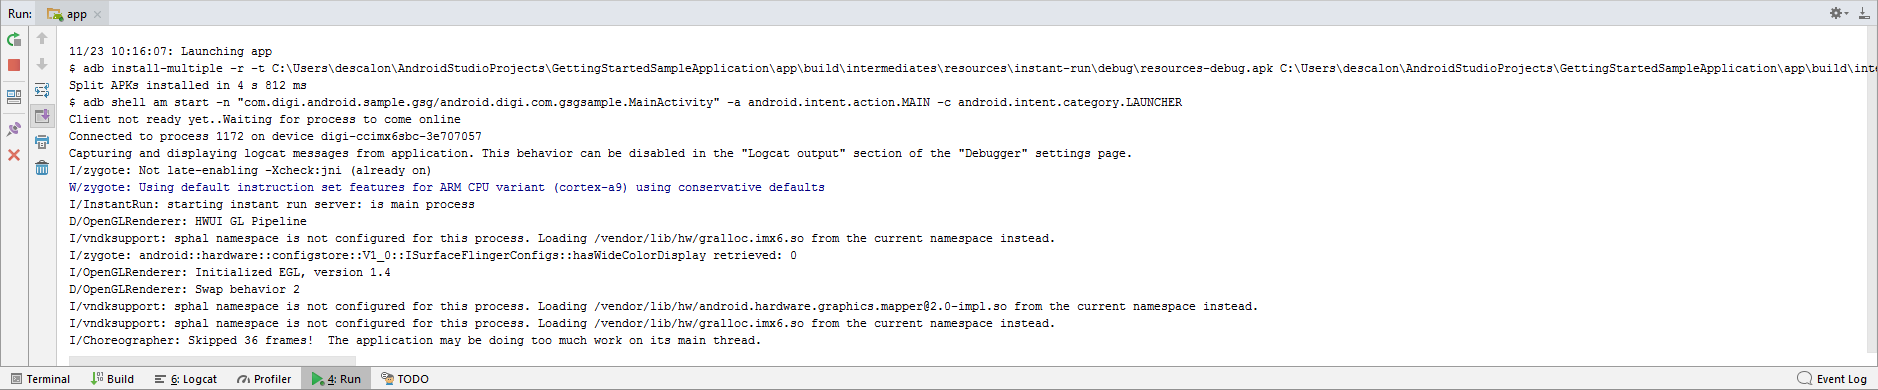
The application automatically transfers and launches in the Android device through the USB connection. The progress of the launch process is displayed in the Run view:
-
You can review the adb and device log messages from the logcat tab:

4. Test the Android application
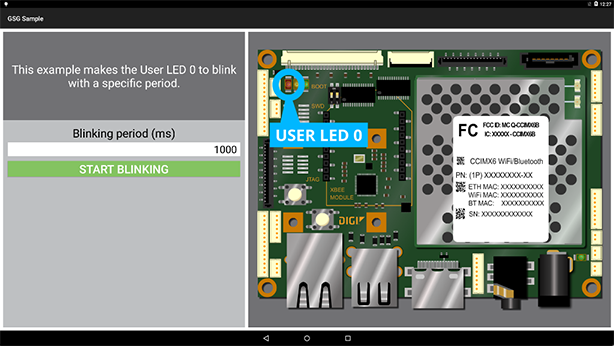
You can test the Getting Started Sample application in the Android device by blinking the User LED on and off to configure its period.
You have successfully created and executed an Android application in your device. As you can see, the process is the same as with any other standard Android device.
Now you can develop more applications with Android Studio using Digi APIs to access the hardware interfaces available in your device, such as the SPI, I2C, ADC, and CAN.
To meet all your project requirements, Digi also lets you customize Android to create your own firmware images from the source code.
