

U-Boot is capable of starting a complete Android system from a microSD card. To boot a system from a microSD card, follow these steps:
1. Create a bootable microSD card from an Android image
Requirements:
-
Root/Administrator permissions in your development computer
-
A microSD card with a minimum capacity of 8 GB
| The following procedure will destroy existing data in the microSD card. |
To create a bootable microSD card from an existing Android image:
-
Download the bootable Android image from this URL: https://ftp1.digi.com/support/android/9.0/r3/82004352_D/ccimx8xsbcpro/userdebug/sdcard.img.gz
-
Extract the .img file from the zip you downloaded into a folder of your choice.
-
Raw write the image on the microSD card using one of the following methods:
-
Insert the microSD card into your computer and check the node Linux assigns to it (/dev/[sdcard]) using dmesg:
$ dmesg
[1413652.901270] sd 41:0:0:0: [sdc] 7744512 512-byte logical blocks: (3.96 GB/3.69 GiB)
[1413652.903140] sd 41:0:0:0: [sdc] No Caching mode page present
[1413652.903144] sd 41:0:0:0: [sdc] Assuming drive cache: write through
[1413652.905638] sd 41:0:0:0: [sdc] No Caching mode page present
[1413652.905642] sd 41:0:0:0: [sdc] Assuming drive cache: write through
[1413652.915154] sdc: sdc1
Using an incorrect device node in the next step might destroy all data on your computer hard drive. -
Raw write the image file to the microSD card with this command:
$ sudo dd if=<path/filename.img> of=/dev/<sdcard> bs=64K && sync
where: * <path/filename.img> must be substituted with the path and filename to the SD card image. * <sdcard> must be substituted with the device node(in the example, /dev/sdc) assigned by Linux to your microSD card. The microSD card is now ready.
-
Download the Win32DiskImager software from http://sourceforge.net/projects/win32diskimager/files/latest/download.
-
Uncompress the software and run it as Administrator.
-
Insert the microSD card into your computer.
-
In the software, select the drive that corresponds to the microSD card. Select the .img image file you want to program and click the Write button. The microSD card is now ready.
2. Boot Android from the microSD card
-
Power off the device.
-
Insert the microSD card into the microSD card holder (bottom side of the board).
-
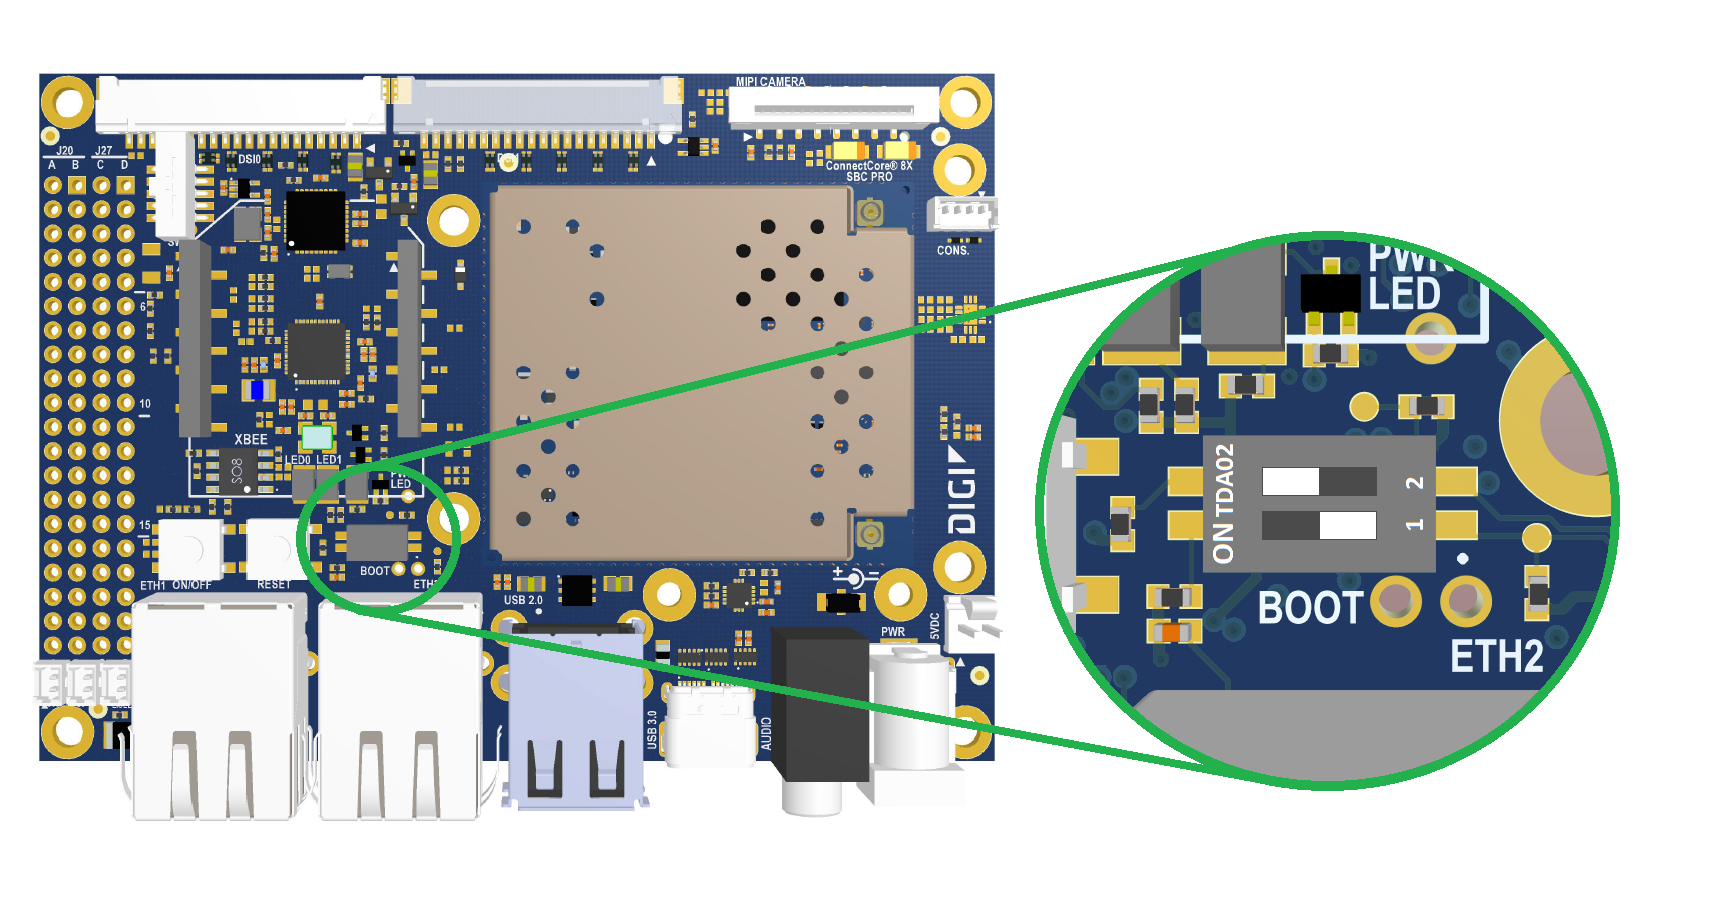
Change the boot source configuration to boot from the microSD card. To do so, set the boot mode micro-switches as follows:
-
BOOT.1 OFF
-
BOOT.2 ON
-
-
Power up the board. Android now boots from the microSD card.