Setup:
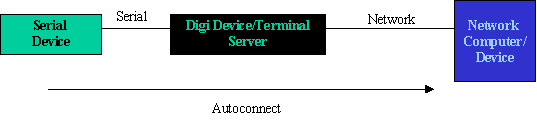
To configure the Digi One Single Port for serial bridging, you will need two units.
Procedure:
NOTE: You will need to be on the latest firmware version for this setup.
1. Launch the Setup Wizard (dgcfgwiz.exe). The Setup Wizard can be located in the driver files for the Digi One SP/IA.
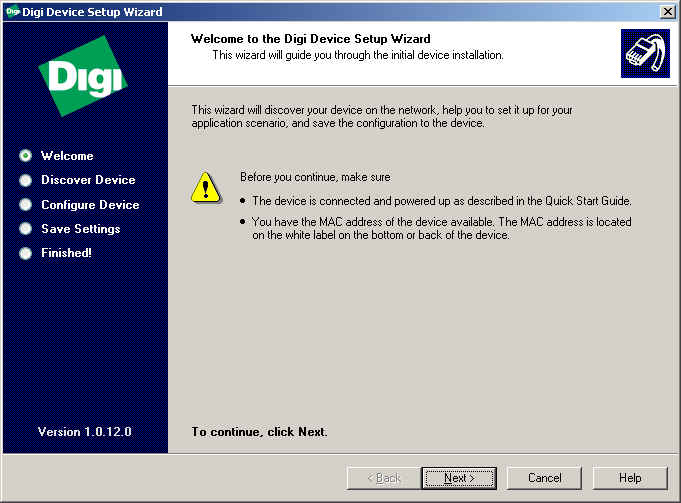
2. Click Next>
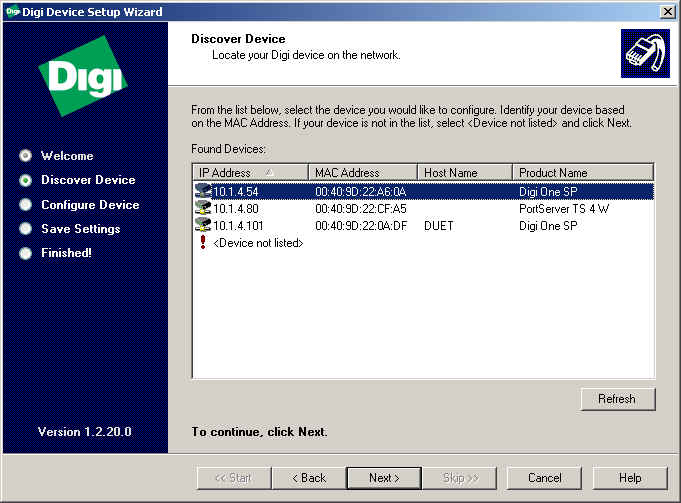
3. Select your Digi Device from the list of Discovered Devices and click Next>. If this is the initial configuration of the Digi
SP/IA Device, you may not have an IP Address assigned, but will be prompted to enter one later in this setup.
NOTE: If you do not see your device in the list, click ! for troubleshooting assistance.
4. If this is the initial configuration of the Digi SP/IA Device, you will be required to configure the Network Settings.
NOTE: If you have already configured your Network Settings, you may want to review the settings for accuracy.
Click Next>.
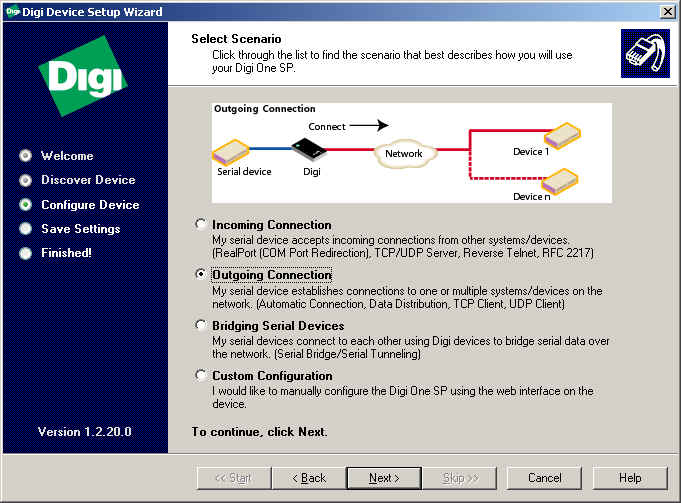
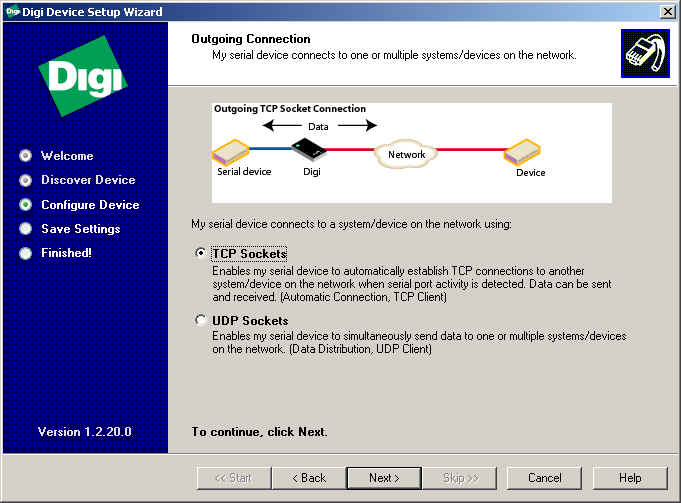
5. Select the radio button next to Outgoing Connection. Click Next>.
6. You will now need to specify how your serial device will connect to your network device (TCP or UDP). In this
case we will choose TCP. Click Next>.
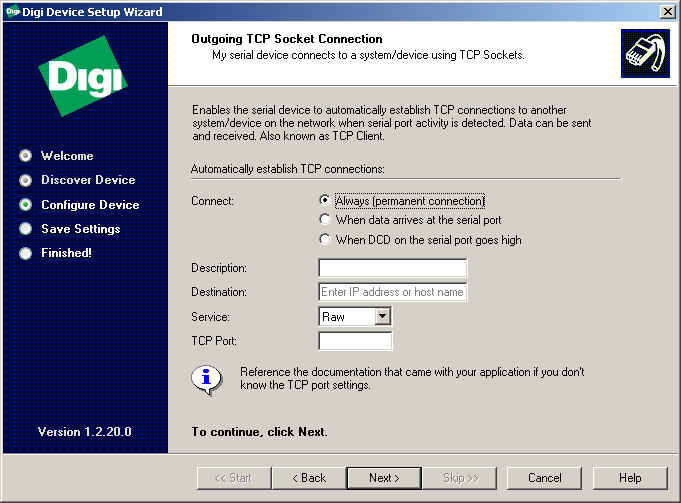
7. Under the Automatically establish TCP connections, specify your connection requirements. You will need to
enter:
A. Description: Give a name to your setup.
B. Destination: Enter the IP Address of the network device you are connecting to.
C. Service: Is the type of service to use for your connect (Raw, Telnet, or Rlogin).
D. TCP Port: Is the TCP port to use, which is determined by the destination system.
NOTE: Here are some tips on specifying port numbers: For RAW connections use 2101, for
TELNET connections use 2001 when going to another Digi Device. Otherwise, use the port required by the application your are running (the TCP port it receives data on).
When you are done entering the necessary information, click Next>.
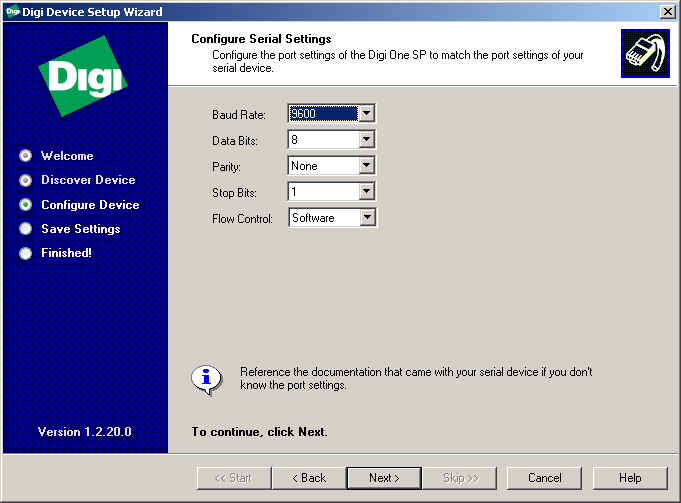
8. Configure the port settings in the following window to match the requirements of the peripheral device you are connecting
to the Digi One SP/IA serial port. Click Next>.
9. You will then be prompted to verify your configuration. If everything appears accurate, click Next>.
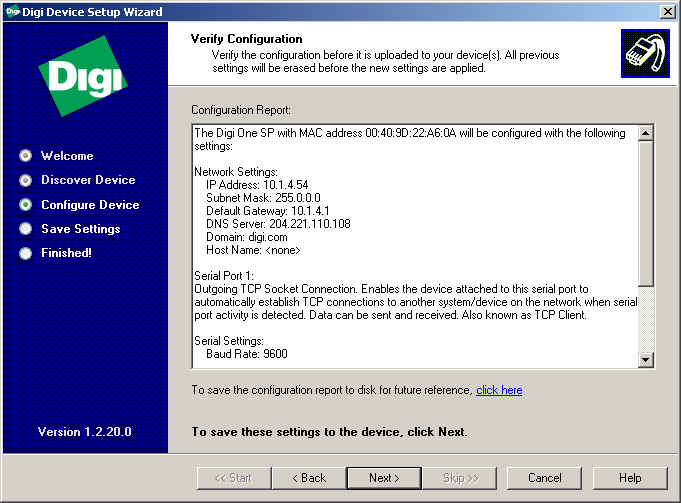
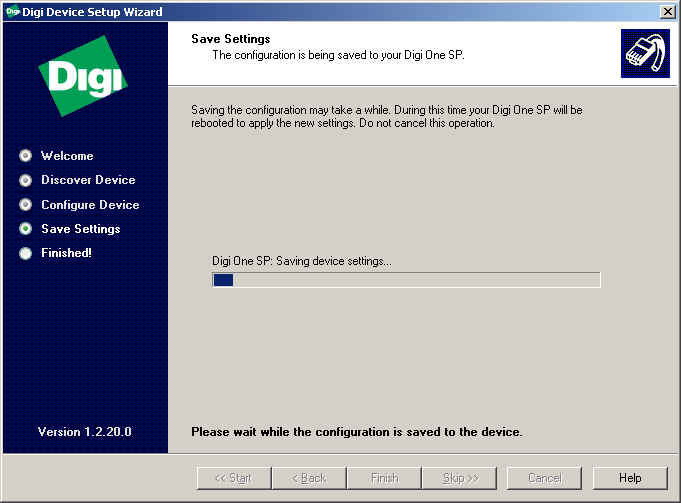
10. It will now take a few moments while it writes the new configuration to the Digi One SP/IA and reboots.
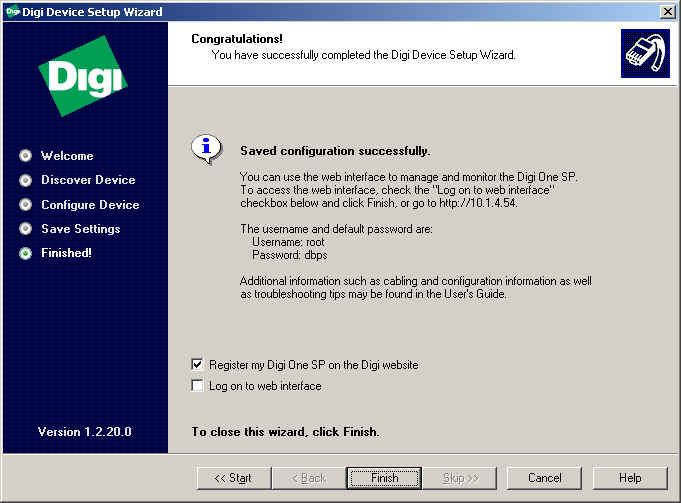
11. If everything is successful, you will see the following message. If you get an error message, you will want to view
the error report for more information.
NOTE: If you have not already registered your product, you will want to do so now.
12. You have now successfully configured both Digi One SP/IA Device.
Last updated:
Feb 11, 2025