To reset the Digi ConnectPort LTS device to its factory default settings, you can perform a firmware upgrade using the BIOS menu. This process reinstalls the firmware, effectively erasing all current configurations and restoring the device to its original state.
To use the Bios menu to flash new firmware, do the following:
- Connect the console port on the rear panel of the Digi ConnectPort LTS unit to a serial port on a workstation. Use the supplied RJ45/DB9F adapter and an Ethernet cable.
- Set up a terminal emulation program such as HyperTerminal. Use the following port parameters:
- bps=9600
- data bits=8
- parity=none
- stop bits=1
- flow control=none
- Reboot or power on the Digi ConnectPort LTS unit.
- Press the ESC key within three seconds of applying power to the device. The following screen is displayed. Use the ESC key to return to an earlier menu screen, and the Enter key to refresh the menu screen.
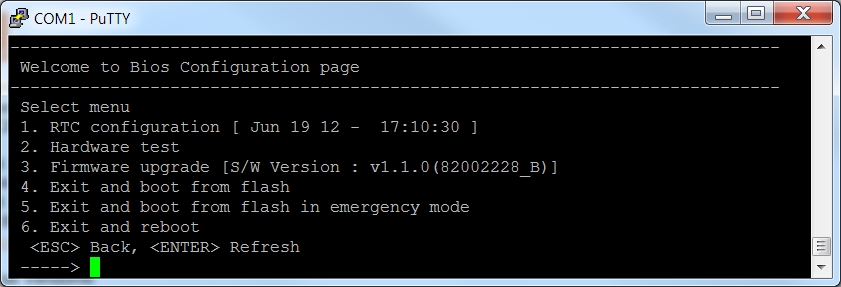
- Choose Firmware upgrade by entering 3. The following screen is displayed.
- Enter the information for the first menu items.
- Protocol: The choices are BOOTP or TFTP.
- IP address assigned: Enter the IP address of the Digi ConnectPort LTS unit.
- Server’s IP address: The IP address of the BOOTP or TFTP server.
- Firmware File Name: The filename for the firmware.
- Ethernet interface: 1 or 2.
- Use the ESC key to return to earlier menu screens.
- Select Start firmware upgrade. The firmware upgrade will take several minutes to process. The factory default settings will be restored.
- When the upgrade process is complete, the device will reboot.