Digi XBee
® Mobile is an iOS and Android compatible app for connecting and configuring Digi XBee 3 devices using their new onboard Bluetooth. If you are familiar with
Digi XCTU, you will immediately have a comfort level with the mobile version, which provides similar functionality.
The
Digi XBee Mobile App helps commission, provision, activate, investigate and update your Digi XBee 3 radio modules wirelessly, with no physical access required. Once Bluetooth is activated, you can leave behind your heavy laptop, development board and USB cables. Going forward, your smartphone is all you'll need to manage your Digi XBee 3 radio module.
The XBee Mobile App is a member of the award-winning tool suite,
Digi XBee Tools which collectively support rapid prototyping, development, configuration, testing, deployment and ongoing management, supporting the complete IoT application lifecycle.
Using the XBee Mobile App
In this hands-on guide, we'll show you how to use the mobile app version of Digi XCTU:
- Look for and connect to nearby XBee 3 BLE devices.
- Get basic information about the device and the firmware version it is running.
- List all the configuration categories and settings of the firmware running in the XBee 3 device.
- Read and change the value of any firmware setting.
- Perform a remote reset of the device.
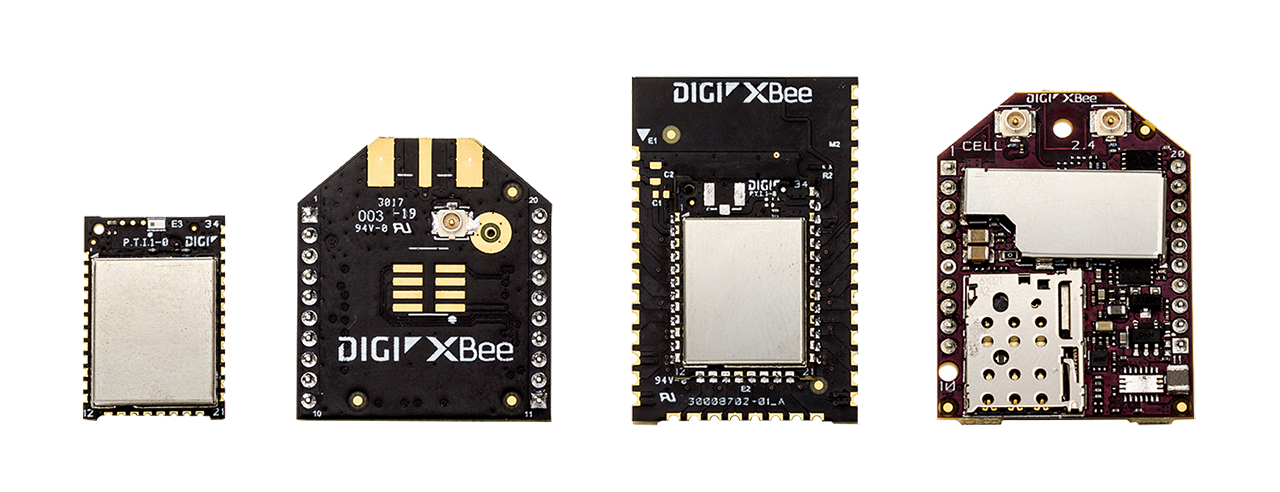
Digi XBee 3 in micro, through-hole and SMT modules, and Digi XBee 3 Cellular
The XBee Mobile App works with:
Configure the XBee 3 Zigbee Radio
Let's get our hands dirty with a Digi XBee 3 Zigbee radio module so you can see for yourself how easy and convenient it is to configure an XBee 3 from your smartphone or tablet with the XBee Mobile App.
Parts Needed
Note: All Digi XBee 3 modules are ready to run Bluetooth. Those with a PCB or Chip antenna require no further components. U.FL modules require an external 2.4 GHz antenna. RF Pad modules expect to be connected to an antenna at the board level. Digi XBee 3 Cellular modems require connecting an external 2.4 GHz Bluetooth antenna, in addition to the cellular LTE antenna normally used. Bluetooth can function even without these antennas, however range will be greatly reduced, so this is not recommended.
Activate Bluetooth
Before using the XBee Mobile App, youll want to activate Bluetooth on your Digi XBee 3 and assign it a password using the XCTU application on a Windows, MacOS or Linux computer.
Set up Digi XCTU
- Download XCTU onto your computer and install it.
- Mount an XBee 3 radio onto the XBIB evaluation board and connect it to the computer.
- Launch XCTU and add a module, using the icon with the plus sign in the upper left, then selecting the appropriate port and baud rate.
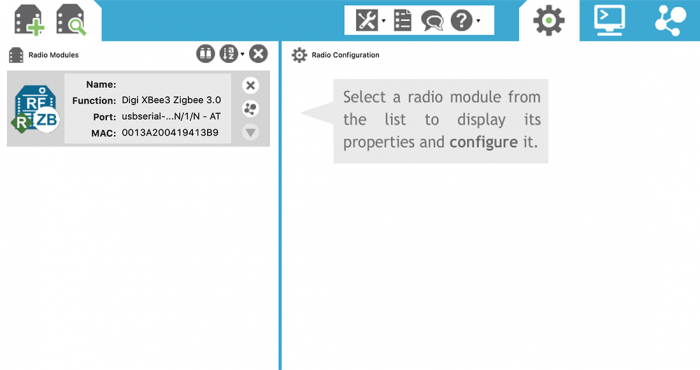
Digi XBee 3 module added to XCTU
- Click on the radio module in the left column to select it. The modules configuration will be displayed in the right column.
- Scroll down to the Bluetooth Options section to configure Bluetooth settings.
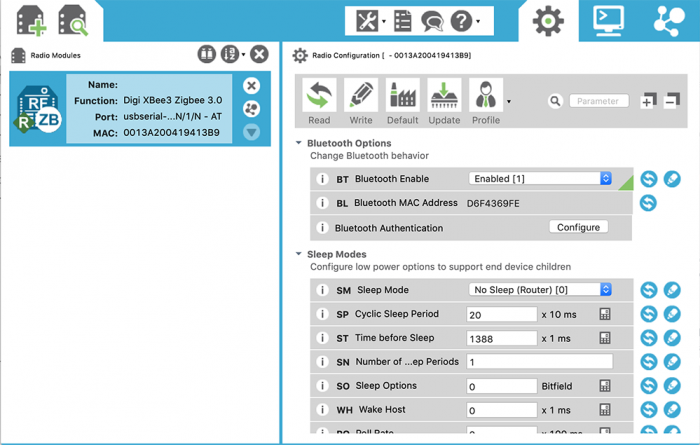
Digi XBee 3 Bluetooth Options in XCTU
- Set BT Bluetooth Enable to "Enabled (1)" and click the pencil icon to save that change to the radio module.
- If a Bluetooth password has not been set, you will automatically be asked to configure it.
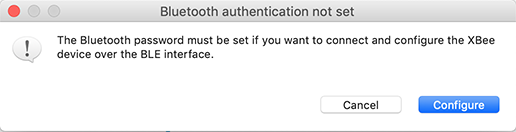
Bluetooth password dialog in XCTU
- The Configure Bluetooth Authentication screen is displayed. Enter a secure password for Basic configuration and click OK to complete the setup.
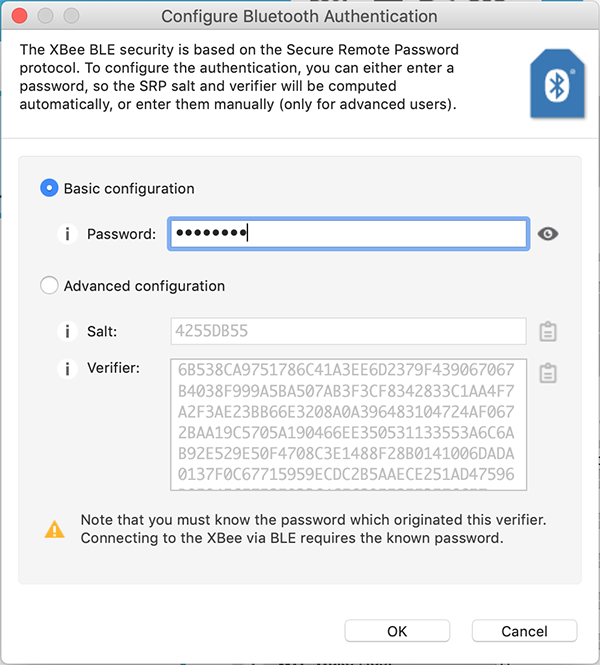
Configure Bluetooth authentication in XCTU
Your Digi XBee 3 radio module now has Bluetooth activated and will allow secure connections from the XBee Mobile application. You can leave the XBIB evaluation board connected to the computer for power, or change to a portable USB battery power supply to go fully wireless.
Related white paper: 5 Reasons You Should Consider Embedded Cellular Connectivity
Install the XBee Mobile App

The XBee Mobile application is a free download for both Android and iOS. Download it onto your tablet or smartphone and launch the app to continue. Be sure to review the XBee Mobile App documentation. Once the app is installed with your XBee 3 radio module powered on, youre ready to connect.
Connecting to XBee 3
When you start the XBee Mobile app, it will search for all nearby Bluetooth-enabled XBee 3 radio modules.