Best practice for creating a Guest Access Point (AP) on a (wifi-capable) DAL-based device.
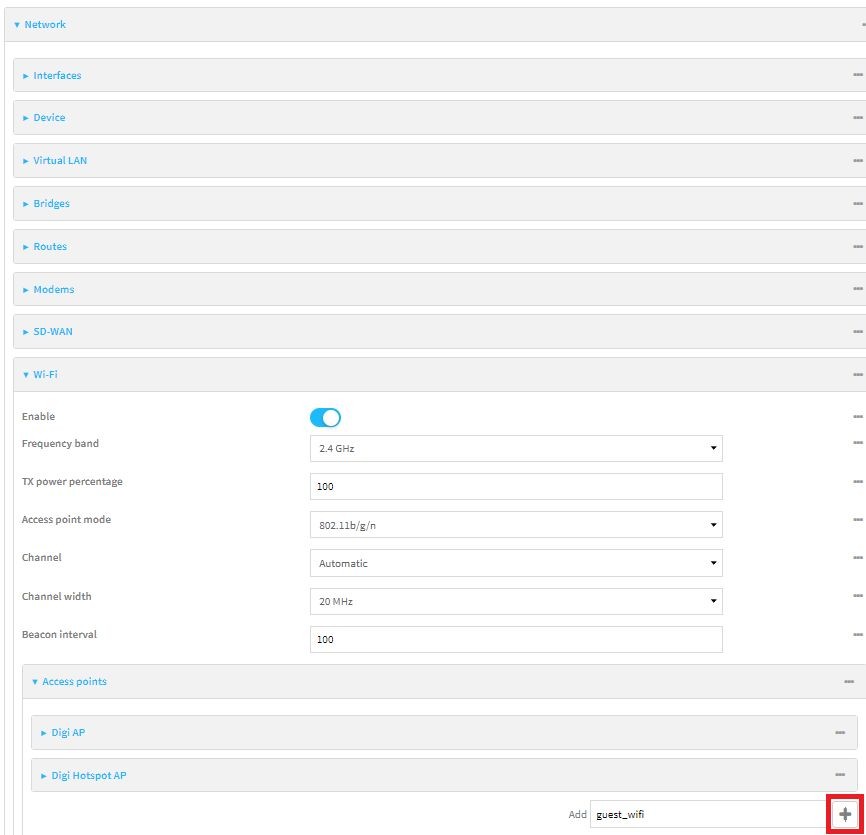
1. From the device’s webUI, navigate to Device Configuration > Network > Wi-Fi > Access Points. In the Add field, input a friendly name for the Guest Access Point (e.g. guest_wifi) then click the plus icon.
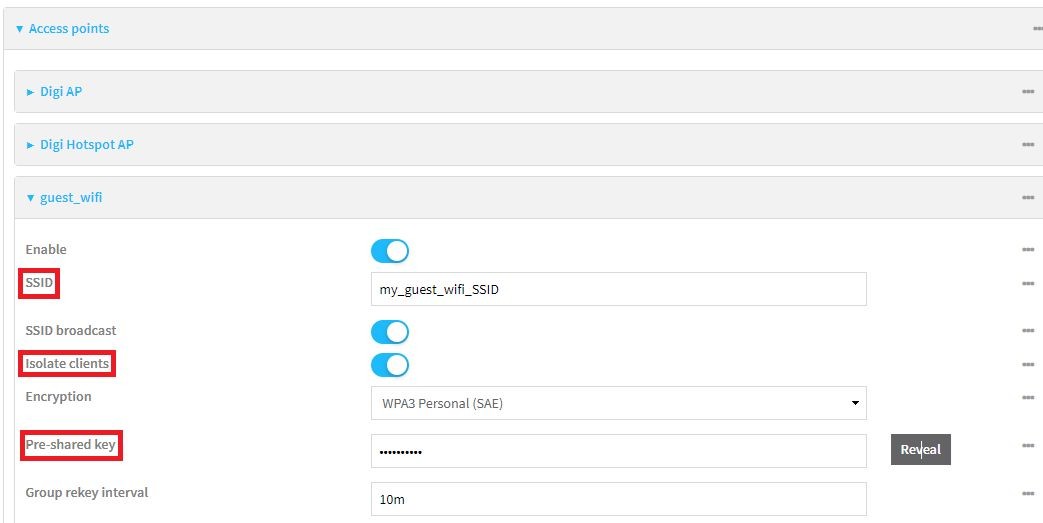
2. Within the properties of this new Access Point, input the SSID you wish to use, optionally enable “Isolate Clients” (to prevent communications between any WiFi clients), and input the Pre-shared Key (PSK) you wish to use.
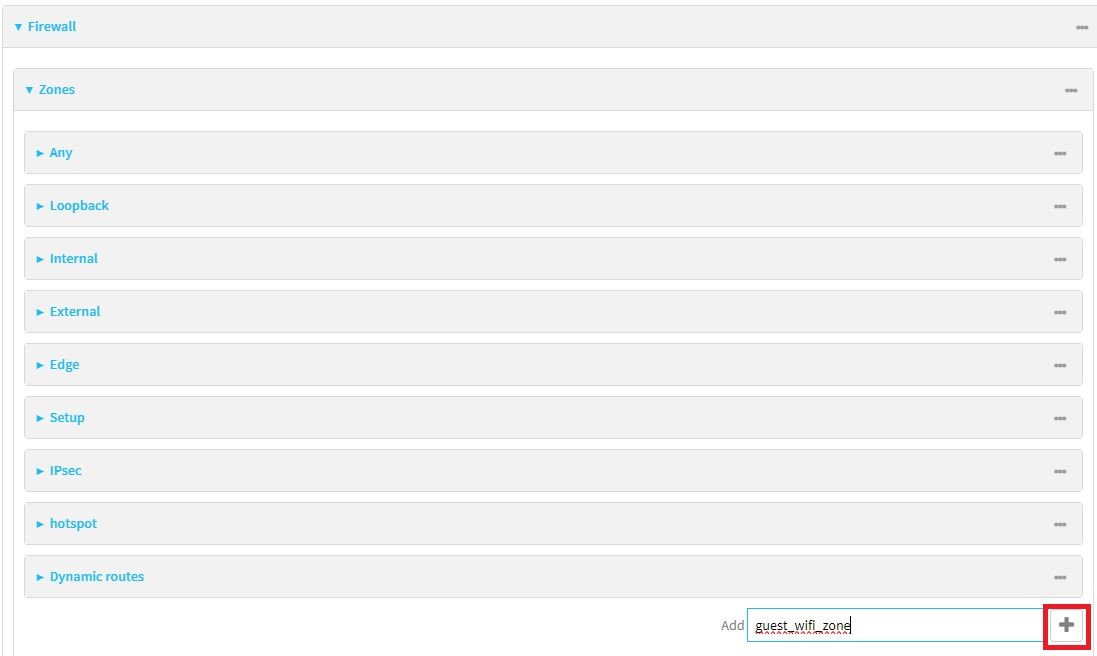
3. Navigate to Firewall > Zones. In the Add field, input a friendly name for the Zone (e.g. guest_wifi_zone) then click the plus icon.
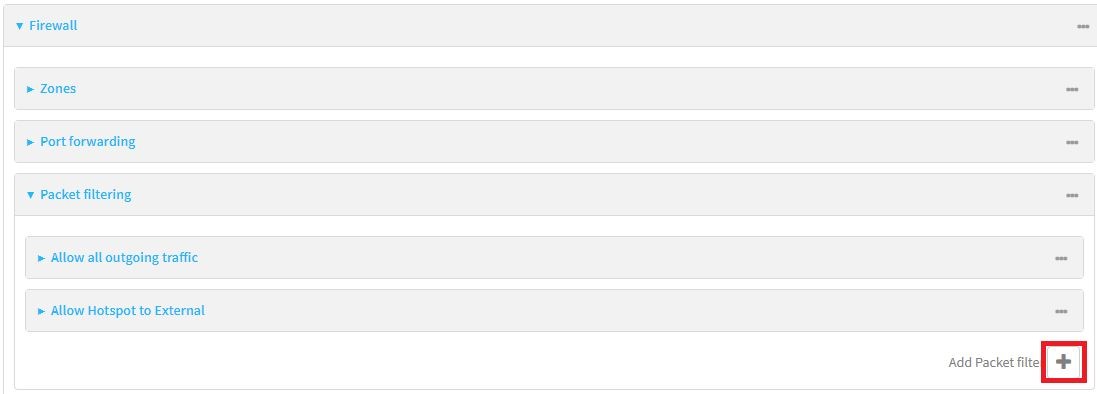
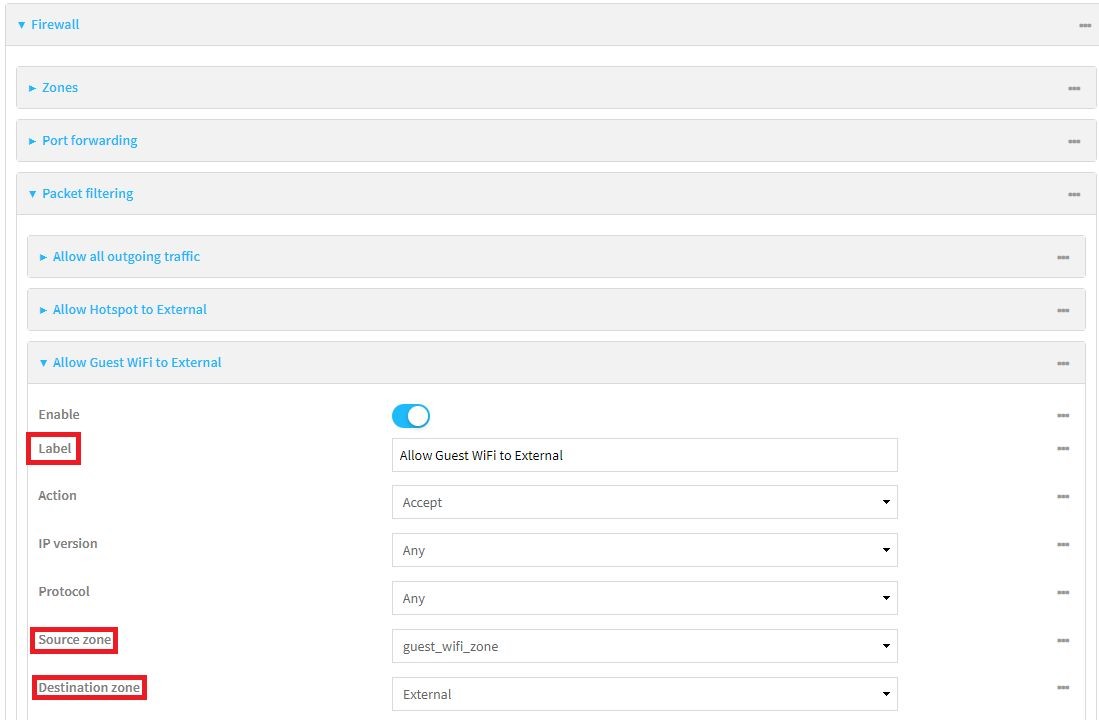
4. Navigate to Firewall > Packet Filtering. Click the plus icon next to “Add Packet Filter”.
5. Within the properties of this new Packet Filter, input an appropriate label (e.g. “Allow Guest WiFi to External”), select “guest_wifi_zone” for the Source Zone, and select “External” for the Destination Zone.
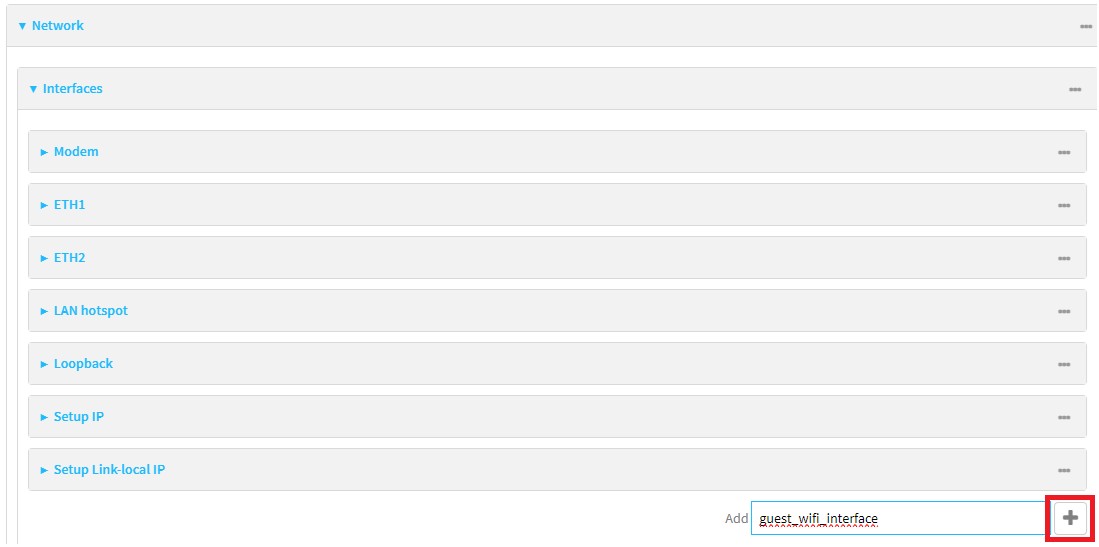
6. Navigate to Network > Interfaces. In the Add field at the bottom-right, input a friendly name for a new network interface for the Guest AP (e.g. “guest_wifi_interface”) then click the Plus icon.
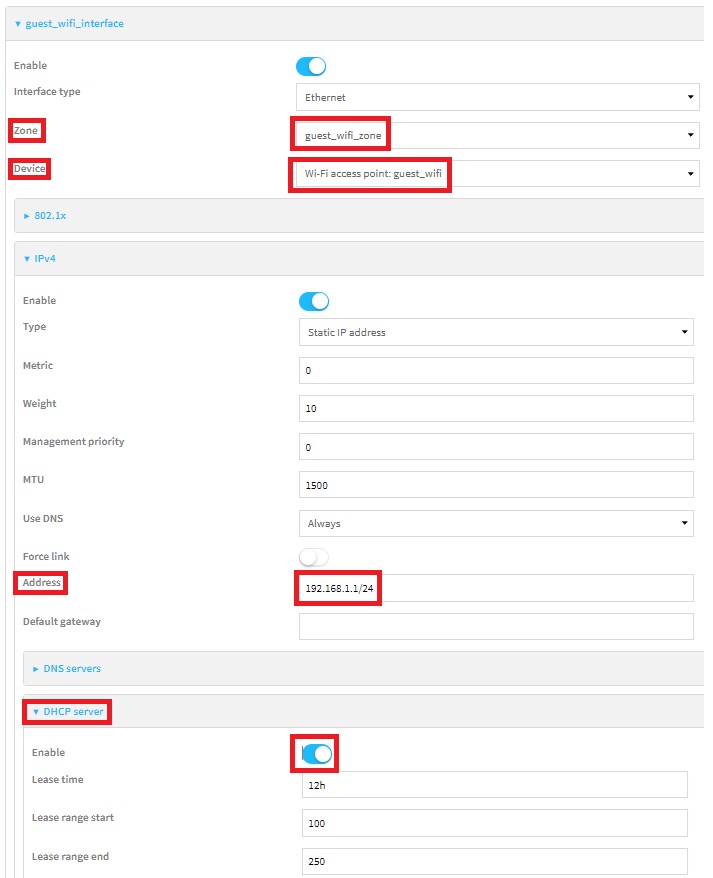
7. Within the properties of this new interface, select “guest_wifi_zone” for the Zone field and select “Wi-Fi access point: guest_wifi” for the Device field.
7a. Expand the IPv4 section of this interface and input the Static IP address that should be assigned to it (e.g. 192.168.1.1/24).
7b. Optional, recommended: Expand the DHCP server section of this interface and toggle the Enable slider such that it’s blue (meaning enabled).
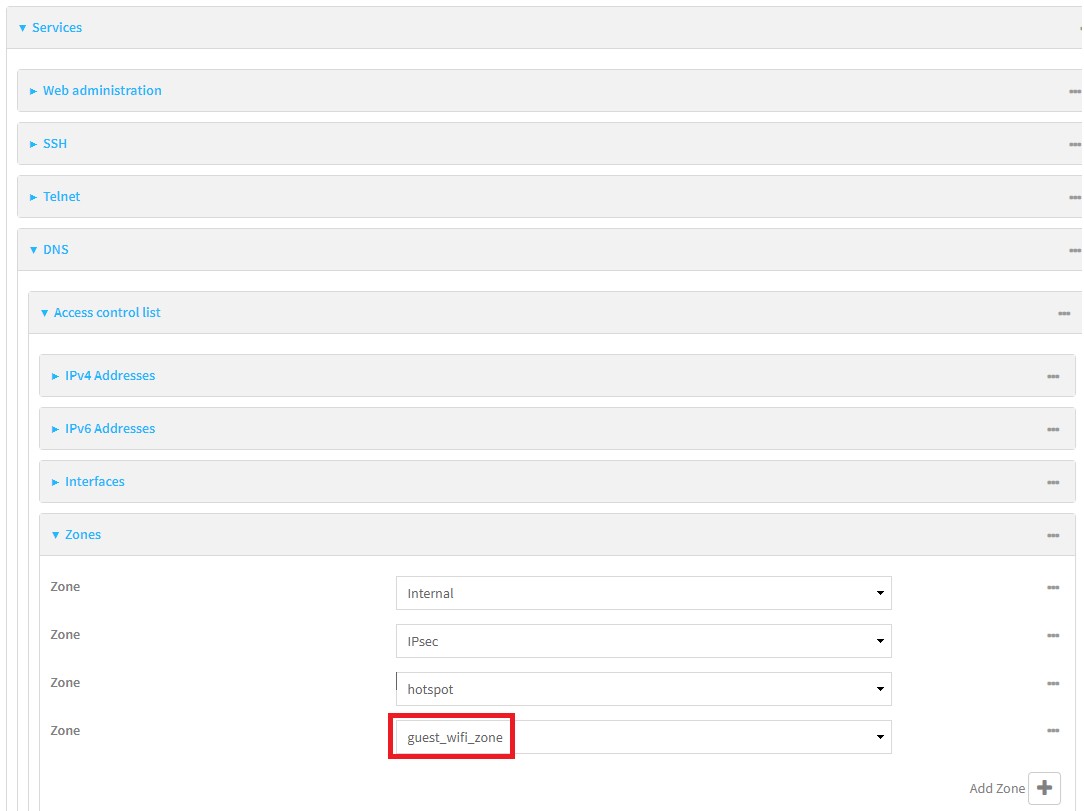
8. Expand Services > DNS > Access Control List > Zones and click the plus icon to add a new Zone. Select “guest_wifi_Zone” from the new dropdown.
9. Finally, click the Apply button at the top-right.
Last updated:
Aug 18, 2026