Introduction
Digi Remote Manager (DRM) does not have a dedicated Backup/Restore function like the one available on a DAL router's local Web UI. The Templates feature, however, can be used to achieve similar outcome, and do so in a way that is more flexible and scales across many devices at once.
Prerequisites
- A Premiere/Digi360 or LifeCycleAssurance Digi Remote Manager Subscription
Issue/Question
How can I back up and restore a DAL router configuration on Digi Remote Manager to achieve the same result as using the local Web UI?
Solution
DRM Templates can be used for this purpose. The result is similar to the Web UI's Backup/Restore function, but more flexible and scalable, since the same Template can be applied to an entire group of devices rather than one at a time.
Below is a step-by-step guide on how to create and use a Template for the backup/restore of a DAL router:
Step 1: Create a New Template
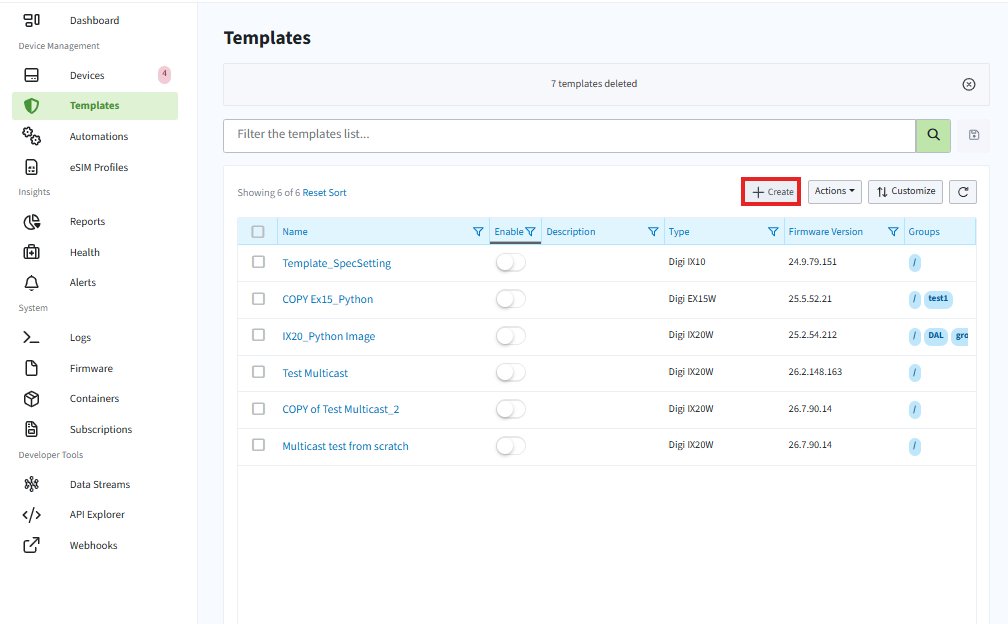
From the left-hand menu, go to Device Management → Templates, and click Create.
Step 2: Enter Template Details
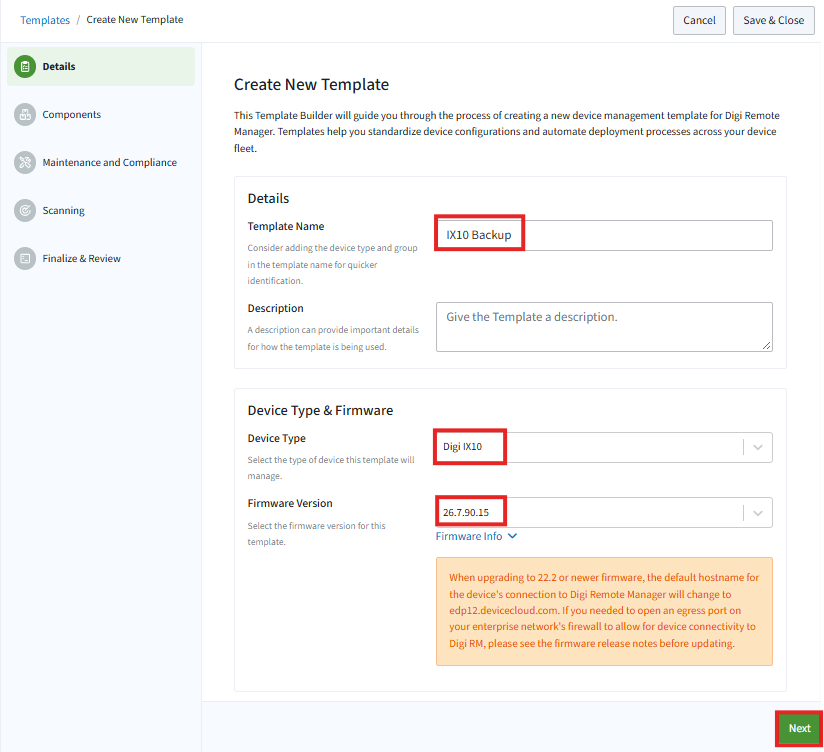
Give the Template a descriptive name (for example, “IX10 Backup”), then select the Device Type and Firmware Version matching the router whose configuration you want to back up.
Step 3: Select Components and a Model Device
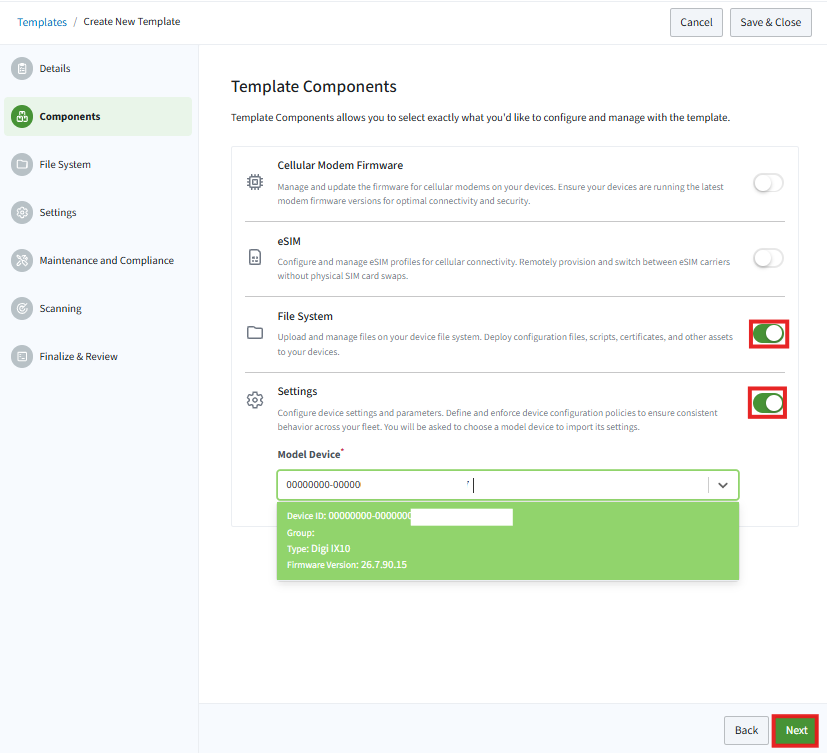
In this section, enable File System and Settings, so the Template manages both the device's files and its configuration. Selecting Settings requires choosing a Model Device, the currently configured router whose settings you want to back up. This will later determine which device(s) can be "restored" from this Template.
Step 4: Upload Files to Back Up
Unlike Settings, the File System component does not automatically read the Model Device's existing files. Any file you want included in the backup, for example a Python script, must be manually uploaded here.
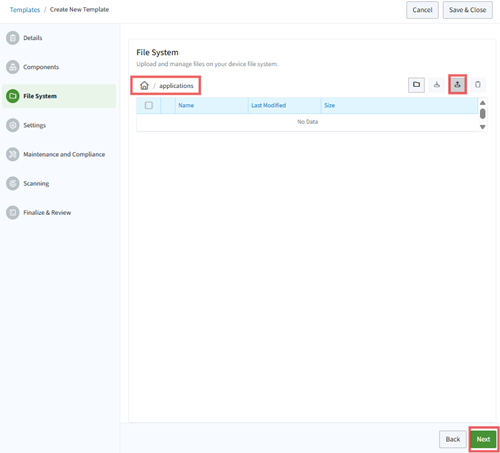
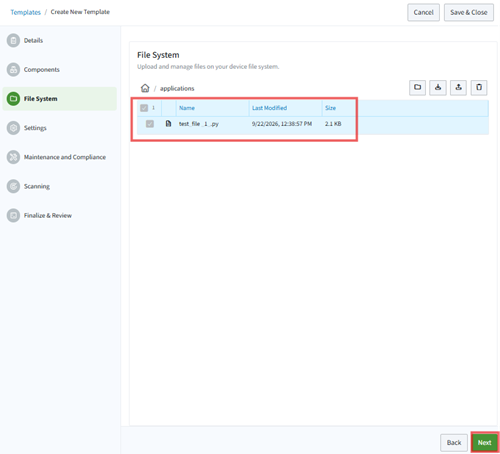
Note: The file itself is not pulled from the Template wizard. To back up a file that already exists on the router, first download it from the device's own page: go to Devices, select the device, open the Files tab, and browse into the relevant folder (e.g. applications).
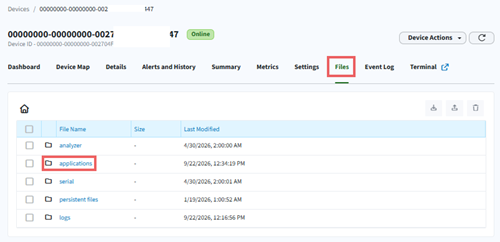
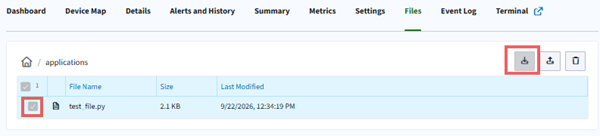
Select the file and click the Download icon to save it locally, then upload that same file into the Template's File System section as shown above.
Step 5: Configure Settings
In the Settings section, click Import From and leave Manage All selected, so that every current setting on the Model Device is imported and marked as Template Managed. This acts as the equivalent of the Web UI's Backup function, capturing the router's full configuration.
.png?lang=en-US)
Step 6: Configure Maintenance and Compliance
This is the step that determines whether the Template only reports drift or actively restores it. Enable Device Remediation so that, once a scan finds a device out of compliance, DRM automatically pushes the corrected settings and files back to it, acting as the equivalent of the Web UI's Restore function.
.png?lang=en-US)
Step 7: Configure Scanning
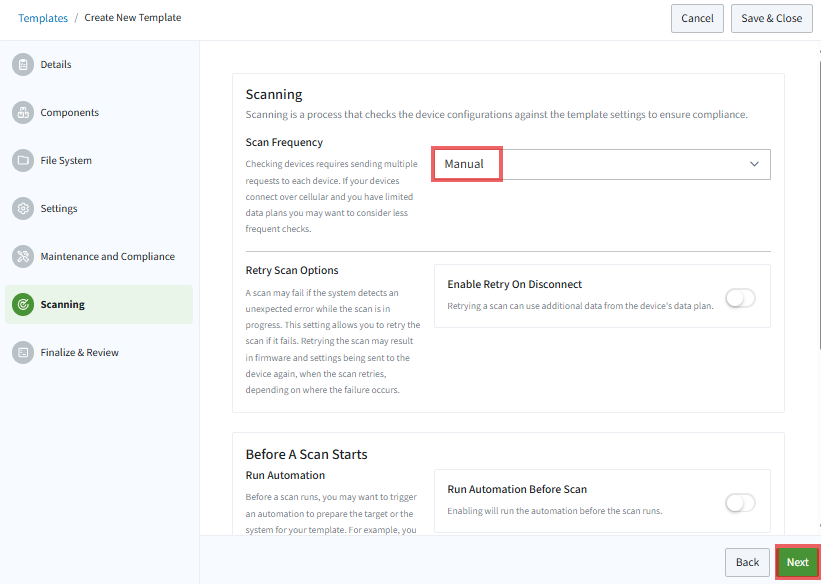
Set the Scan Frequency to Manual, so the Template only runs, and only restores devices, when you explicitly trigger it, rather than on an automatic schedule, just like the Restore function on the Web UI.
Step 8: Assign a Group and Finalize
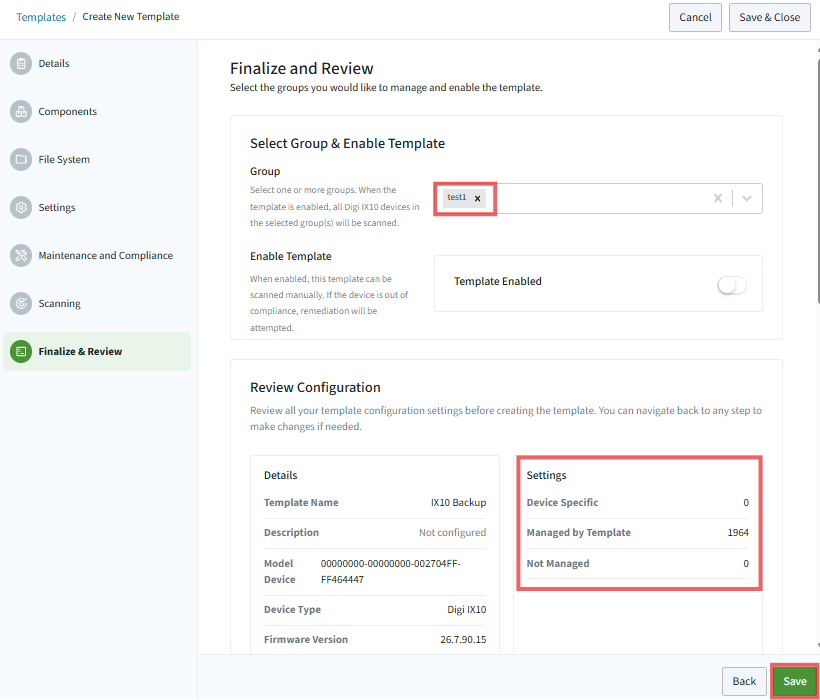
On the Finalize & Review page, select the Group of devices this backup Template applies to, review the configuration summary, and click Save.
Testing a Restore from the Backup Template
To validate that the Template actually works as a restore mechanism, the following test was performed on a device whose settings and file had been deliberately changed from the backed-up configuration.
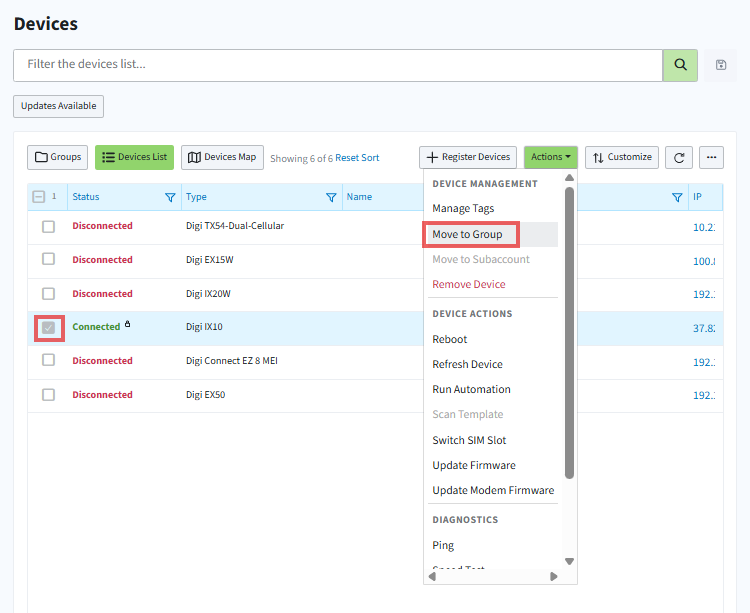
First, the target device must be a member of the Group associated with the Template. From Devices, select the device, then Actions → Move to Group.
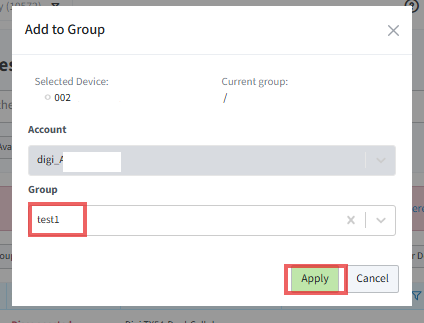
In the Add to Group dialog, select the Group used by the Template (in this case, "test1") and click Apply.
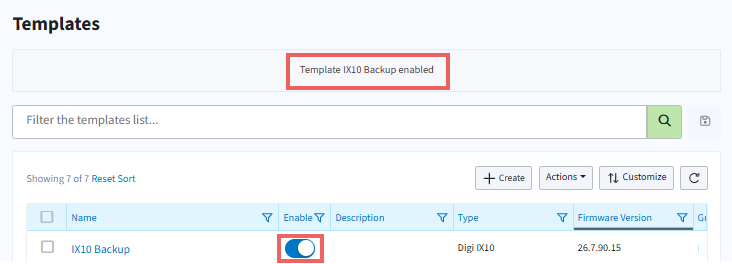
Next, enable the Template from the Templates list. A confirmation banner appears, and the toggle switches on.
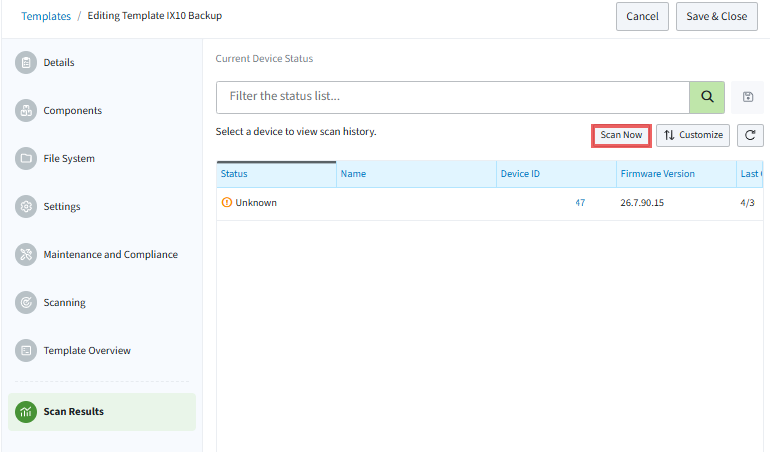
Since scanning was set to Manual, open the Template, go to Scan Results, and click "Scan Now" to trigger the compliance check immediately rather than waiting for a scheduled scan.
Once the scan completes, the Template Scan History shows the full sequence: the settings and file that were found non-compliant, followed by confirmation that both the settings and the file system were remediated, and finally that the device is compliant.
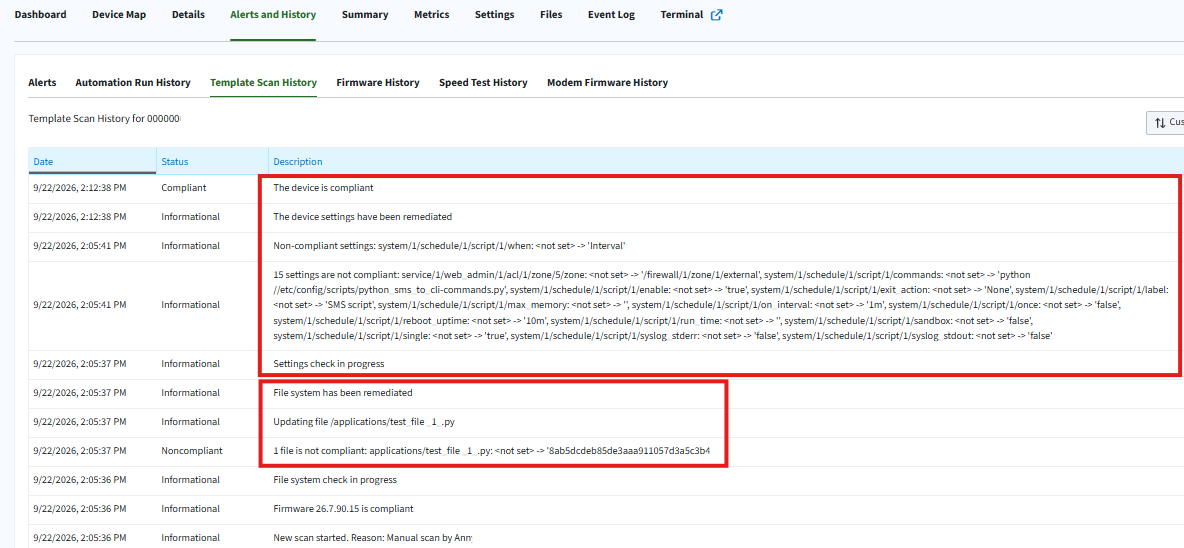
This confirms that the Template successfully restored both the configuration and the file to match the original backup.
Further Information
The new Digi Remote Manager Templates guide can be found here: https://www.digi.com/resources/documentation/Digidocs/templates/home.htm/user_guides/templates/Home.htm
Last updated:
Sep 22, 2026