Tools needed
Digi Connect device
PC or laptop
Serial Cable (crossover, DB-9 to DB-9)
Tool to hold in reset button
Firmware Image to be uploaded
TFTP server (can run on the above PC or laptop)
Procedure
1. Power off Digi Device.
2. Connect the serial cable to the port on the Digi Connect marked ?serial? or ?console?. Then connect the other end of the serial cable to the laptop or PC.
3. From the computer connect to the serial port (i.e. Hyperterm). Use serial settings 9600 baud, 8 data bits, no parity, 1 stop bit, with no flow control.
4. Power up the Digi Device while holding in the reset button with a non-sharp instrument. The reset button is located underneath the unit next to the dip switches.
5. Press the letter v on the serial connection (i.e. Hyperterm) while holding in the reset button. You should see the POST menu appear on the terminal screen.
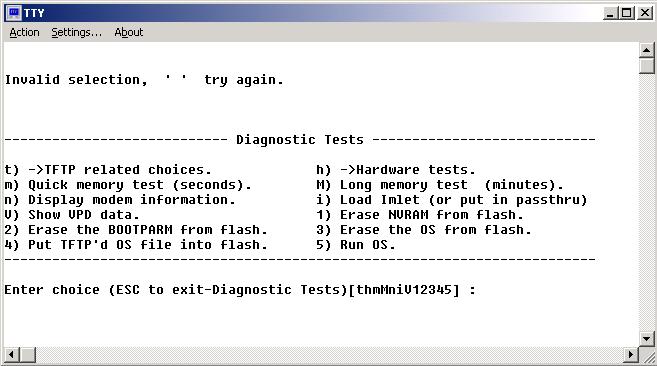
6. At the prompt press the letter t to select the TFTP related options.
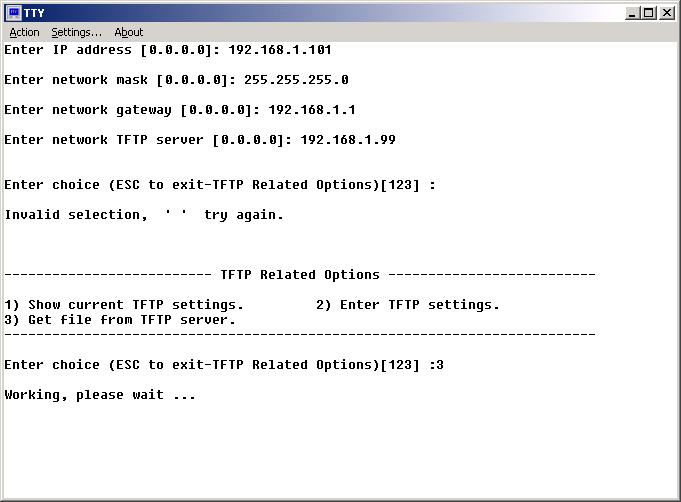
7. At the TFTP submenu select 2 to enter new TFTP related paramaters:

8. TFTP filename = Enter the name of the file you wish to load from the TFTP server to the Digi Connect.
IP address = Enter the ip address that you wish the Digi Connect will have during the firmware download.
Network Mask = Enter the the Network Mask that the Digi Connect will have during the firmware download.
Network Gateway = Enter the Network Gateway that the Digi Connect will use during the download.
Network TFTP server = Enter the IP address of the TFTP server here.
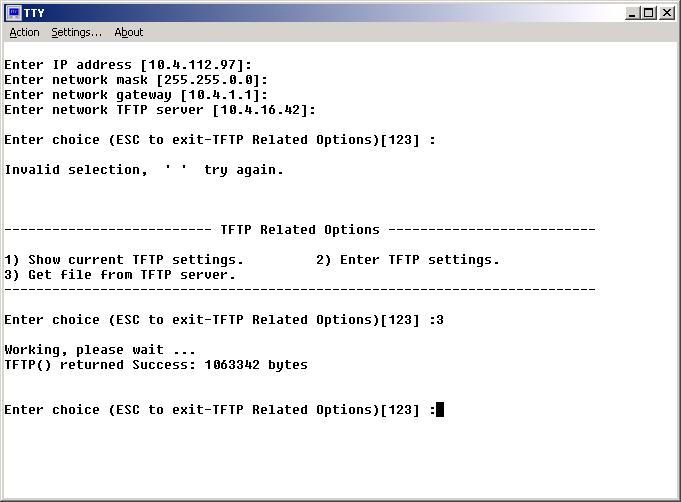
9. Press 3 to start the firmware download from the TFTP server to the Digi Connect device.
10. Upon completion a message will be display whether the procedure was successful or not.
11. Press the [Esc] key to get back into the main POST menu.
12. Select 4 to program the downloaded image onto the Digi Connect device.
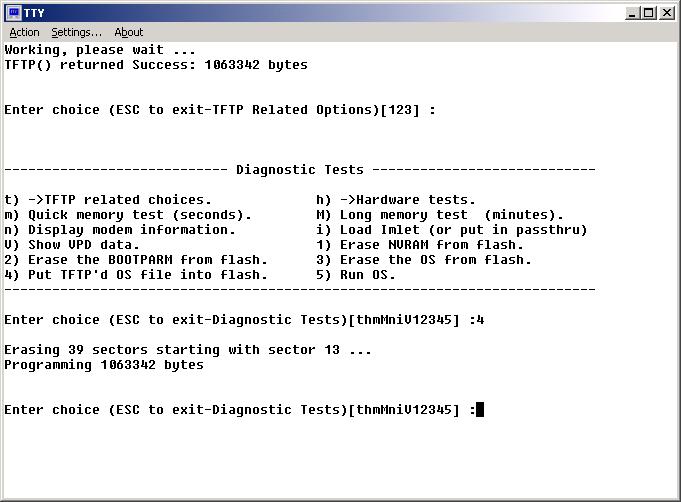
13. Upon receiving the completion message the firmware image should be loaded. Power cycle the unit and your done.