Introduction:
Digi is in the process of migrating to a single operating system on cellular routers and extenders – its name is Digi Accelerated Linux (DAL). This is part of an initiative to make Digi devices increasingly uniform to reduce the learning curve and improve the user experience for customers. Meanwhile, other Digi software developers are simultaneously introducing new functionality into Digi on a daily basis, as the move continues toward Digi Remote Manager 3.0. One of the most powerful new features is console access through Remote Manager for DAL devices.
In addition to an intuitive user interface, DAL also includes a command line interface (CLI) accessible through an included console that is part of the device user interface (UI). Historically, Digi routers running the SarOS and xOS operating systems have had a Remote Manager option to “Execute a command.” This provides a CLI console for those devices, and has been available since Digi Remote Manager 2.0. However, this is the first time console access has been made available for DAL devices on the Digi platform, and this feature can only be found in Remote Manager 3.0.
Applicability:
This article currently pertains to all devices running the DAL operating system, including the IX14, EX15, 6330-MX, and 6310-DX.
Procedure:
In order to leverage console access through Remote Manager 3.0, you will first need to enable shell access on your device. The following procedure makes this easy and works with virtually all DAL devices – even those whose names may not be listed:
http://ftp1.digi.com/support/documentation/accelerated/Config_examples/Enabling_Shell_Access.pdf
Once you have verified that shell access through the console is working properly when connected directly to your devices, you can test functionality through Digi Remote Manager. In order to do this, first ensure you have an account and available license(s) for the platform. If not, sign up for a 30-day trial account at the address below:
https://myaccount.digi.com/
Now log in and add the DAL cellular device to your Remote Manager account. Click the green button labeled, Try the Remote Manager 3.0 Preview. Note: Examples below show the EX15 cellular extender:
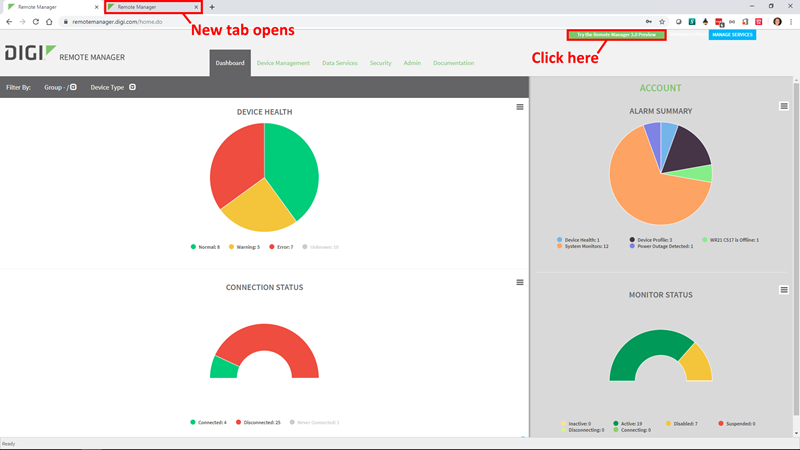
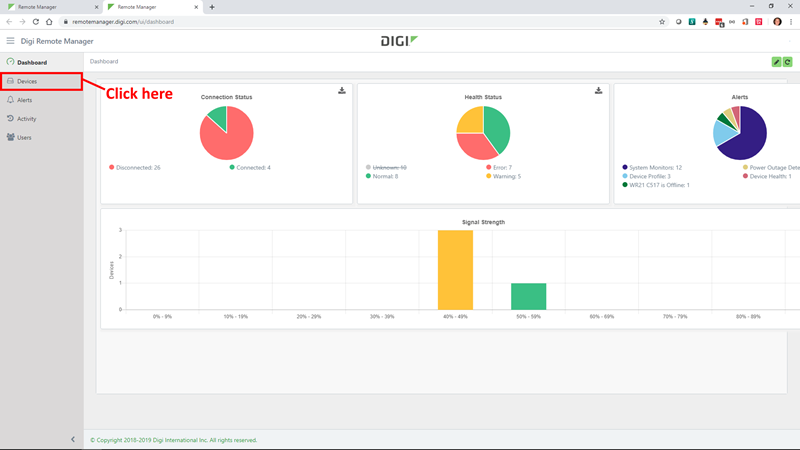
When you switch to the newly opened tab in your browser, you should see the following screen with an updated dashboard view. Click the link that says, Devices.
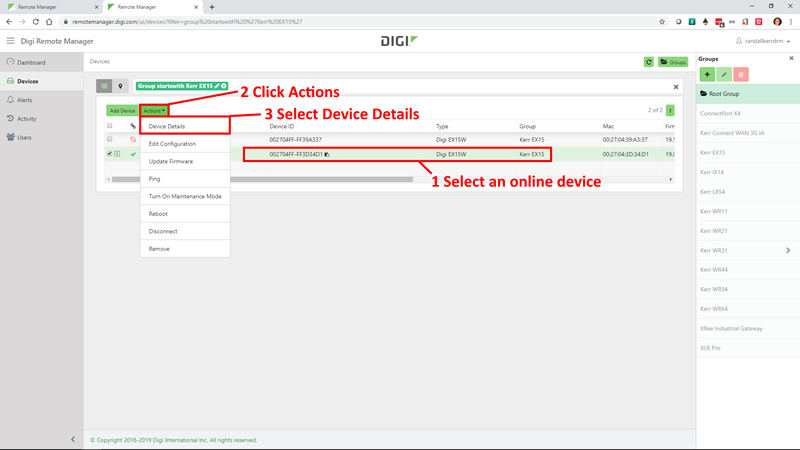
Once you have opened the device list, you will need to select one of the online devices currently communicating with your Remote Manager account. Then click the Actions dropdown and select Device Details.
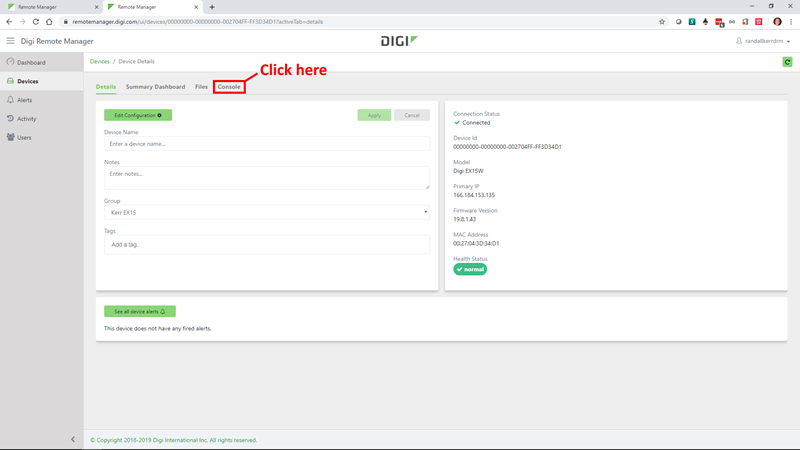
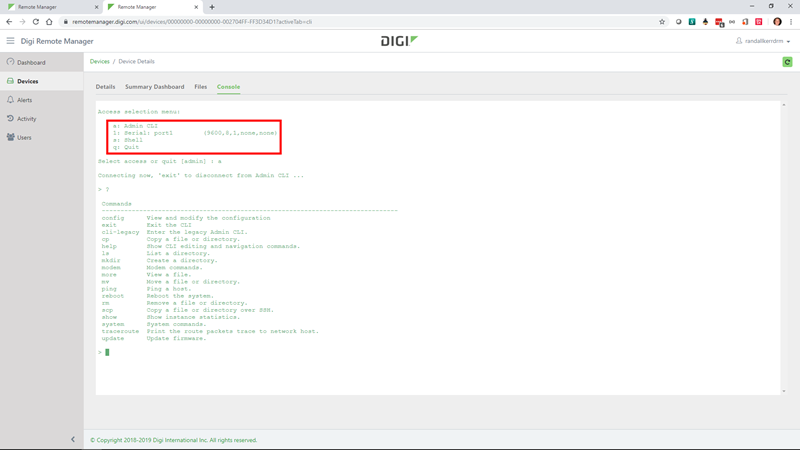
You will receive options for device details, a summary dashboard for connection history, file uploads / downloads, and a console interface. Click Console to activate the console view.
Now you will receive a list of options that includes an administrator command line interface, serial port terminal, Linux shell access, and a quit option. Once you make a selection, you will be securely interacting with your cellular device in a live console session through Digi Remote Manager.
Conclusion:
Digi Remote Manager 3.0 is increasing in features with every passing day. The latest addition of console access for devices running the DAL operating system is a significant value-add for customers with the desire to directly engage hardware in secure real-time sessions.
For more information about the power of console access through the DAL operating system, see the following articles: