Introduction
Provisioning Application is used to provision devices/gateways between accounts. Devices/Gateways should be the first factory provisioned and they will be added to the database. Only devices/gateways in the database can be provisioned between accounts through the Provisioning Application. The QR codes of the devices/gateways will be scanned to provision. Devices/Gateways will be provisioned to the account that is used to login into the application.
Provisioning a Gateway
1) Log in to the application
.png?lang=en-US)
Figure 1: Login Page
2) Make sure webcam is working and have access to scan QR code and then click on Start Scan and scan the QR Code
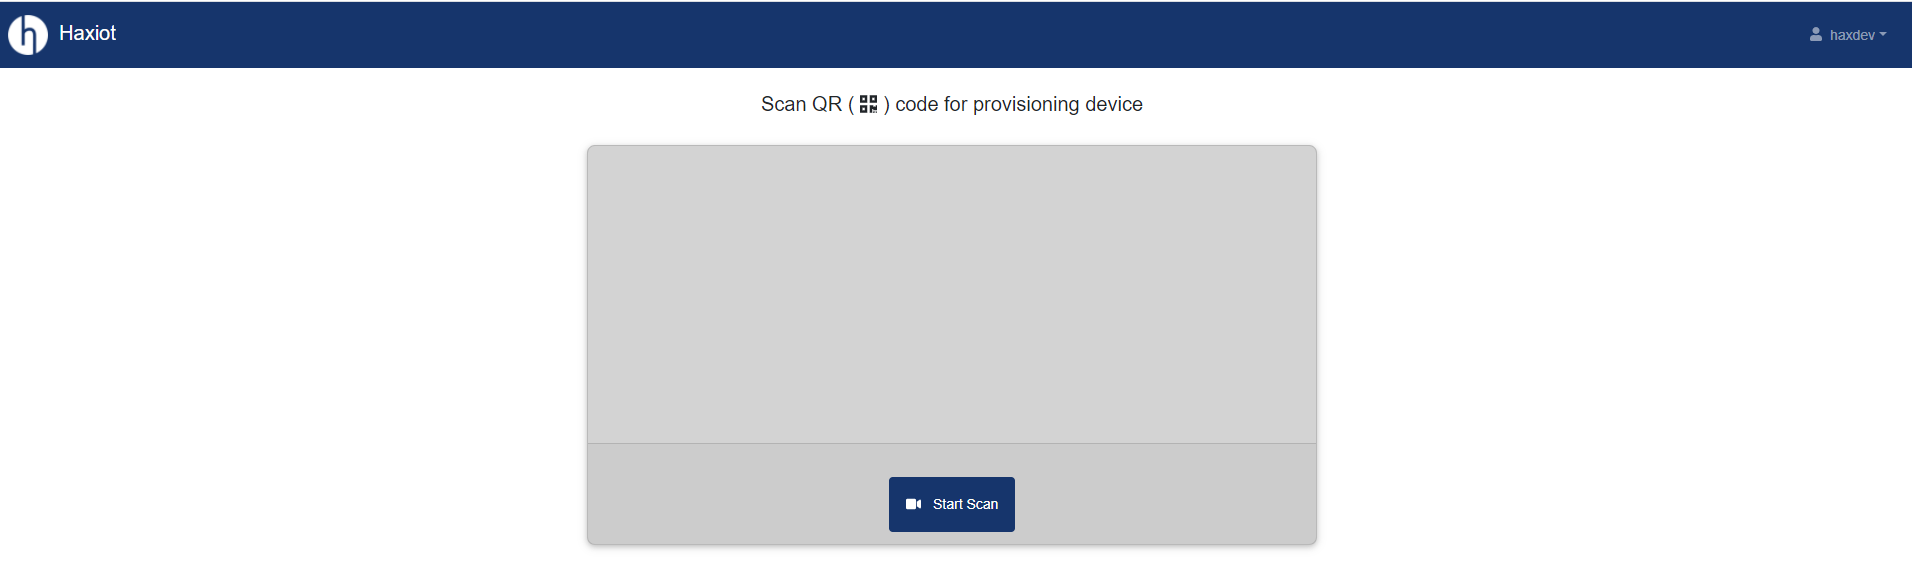
Figure 2: Scan Page
3) Once the QR code is scanned, it will take you to the Provision page. Allow accessing your location to save the location on Provisioning. Here the description of Gateway/Device can be edited. Click on Provision.
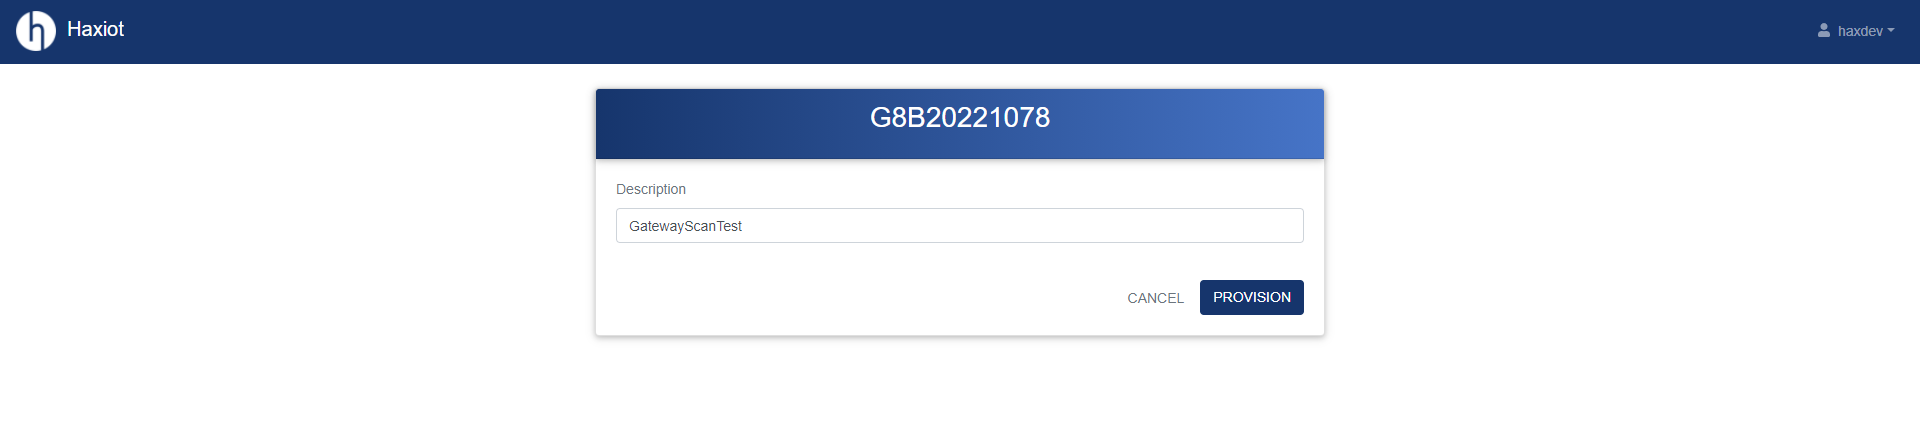
Figure 3: Provision Page
4) When the gateway is provisioned, it displays the messages as below
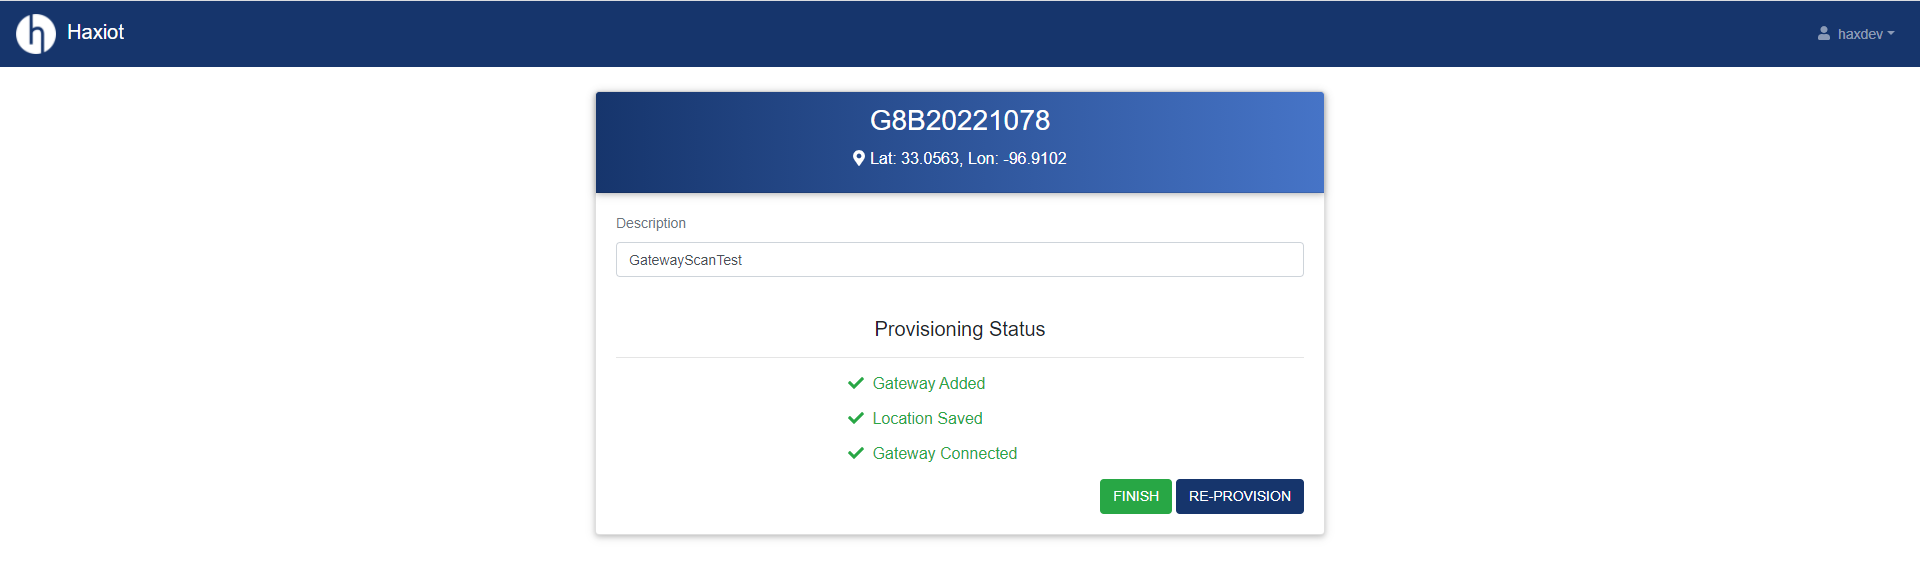
Figure 4: After Gateway Provisioning
5) Click Finish to scan an another gateway.
Provisioning a Device
1) Follow steps 1, 2, 3, 4, and 5 same as above (Provisioning a Gateway)
2) Below are the screenshots for reference when you provision a device. For device, we can change the application from the dropdown.

Figure 5: Device Provision Page
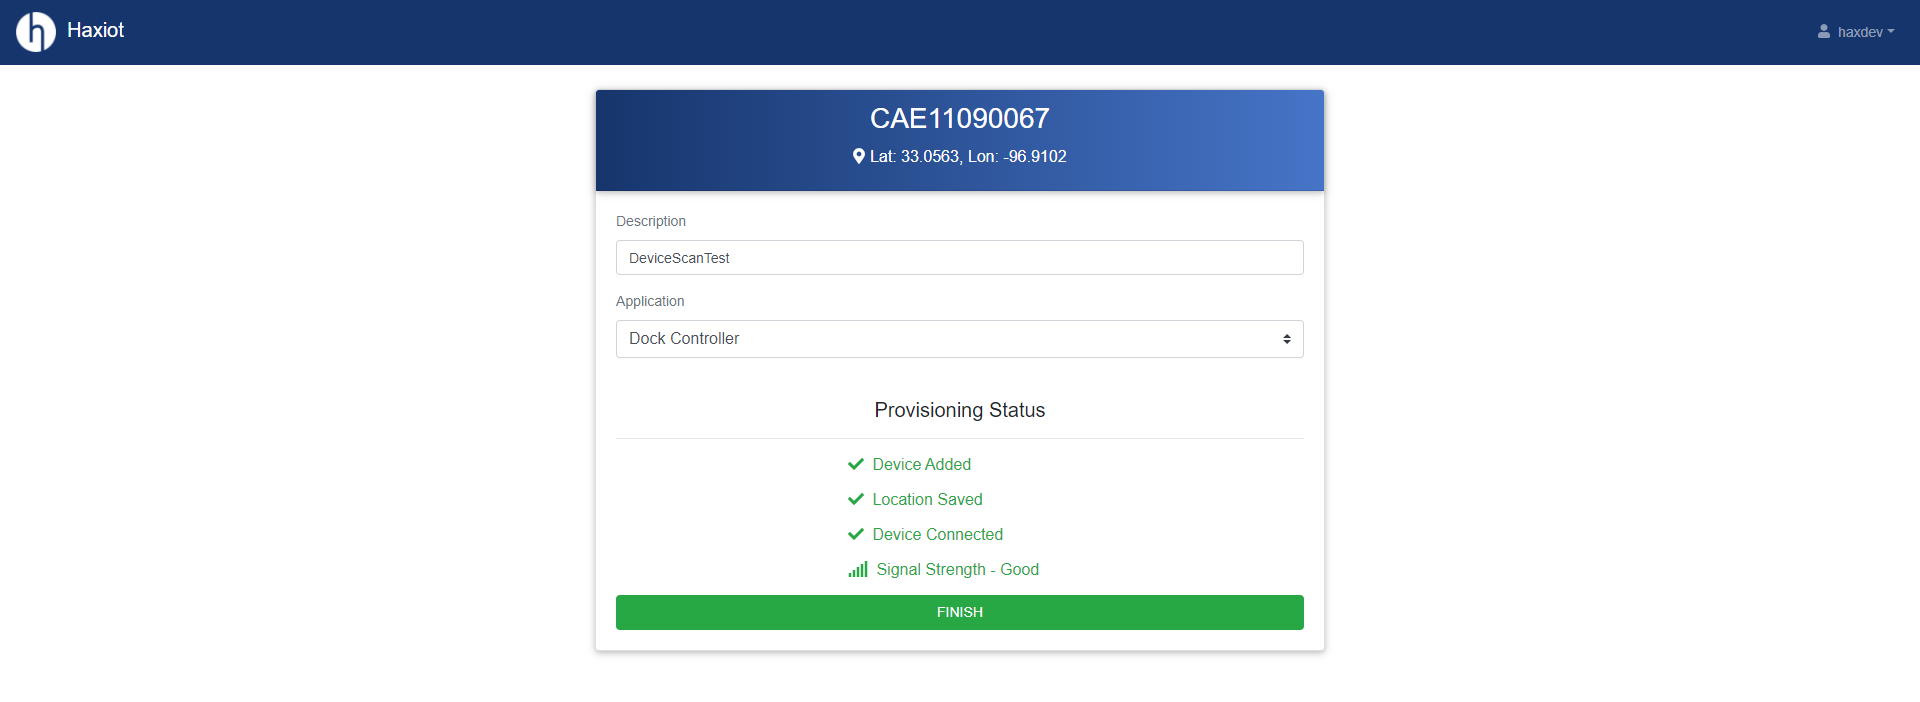
Figure 6: After Device Provisioning
Last updated:
Jan 01, 2024