Background
Digi® products that run DAL firmware offer multiple methods for configuring the device, both remotely and locally onsite. This article outlines these various methods, which are:
By default, these products will communicate with a Digi central management portal, Digi Remote Manager to sync its configuration settings. The benefit of central management is users can easily configure and maintain a fleet of devices in the field. Users can remotely configure the Digi products as part of staging the units before deployment. Devices also automatically sync with the Digi management portals, which helps keep the devices running working configuration settings, and ensuring that any incorrect configurations are resolved.
In addition to the methods for configuring the Digi devices through Digi Remote Manager, users can disable central management and locally manage the configuration settings of the device, thereby providing an isolated environment for configuring and managing the Digi device.
Applicable Digi Devices
Using Digi Remote Manager
1. Start by ensuring your Digi router is powered on, is online with an active Internet connection, and shows as connected in the Digi Remote Manager portal. Below are links that detail setting up a login to access Digi Remote Manager, as well as how to add Digi devices to Remote Manager.
Setting up new login access: Contact Digi Sales.
Adding devices to DRM: See the Central Management section of the user guide for your device.
2. Once you login to Digi Remote Manager, click the Devices tab, look up the device you are interested in configuration, then select the Device ID link. Once you are viewing the details for that specific device, select the Settings tab.
.jpg?lang=en-us&width=700&height=349)
3. Expand Config
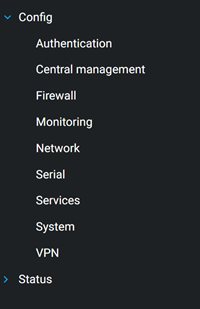
4. You are then presented with subset of configuration sections. Refer to the configuration examples in the various Digi product user guides for details on configuring specific settings on Digi devices.
5. After you make any configuration changes through Digi Remote Manager, click the Apply button to save those configuration settings. Once the Apply button is selected, Digi Remote Manager immediately contacts the Digi device to apply the configuration changes to the unit. If the device is unreachable, the Remote Manager portal prompts the user with the option to apply the configuration changes after the device reconnects to the Remote Manager portal.
Note:
In addition to configuring Digi devices individually, the Remote Manager portal also provides Templates that can be used to configure multiple devices. These templates can be used to apply the same configuration settings, firmware version, and local filesystem contents to multiple devices at once. Digi Remote Manager can also be configured to regularly inspect each device associated to a template to ensure its configuration, firmware, and filesystem contents are in sync with what is specified in the template. Instructions for setting up a device template in Digi Remote Manager can be found in the link below.
Templates
Reminders
-
By default, the configuration shown for a Digi device in Digi Remote Manager is tied to local configuration settings on the device.
-
The template created through using the Template functionality is created based on a selected "master" device's local config settings at the time of creating the template.
-
The configuration settings reside initially on the device. Templates can be used to create a "group config" for the Digi device, which gets pulled from the device, stored in Digi Remote Manager, and then Digi Remote Manager can be set to push those config settings immediately or at an interval to one or more Digi devices of the same model.
-
Digi Remote Manager's templates can override some or all of the configuration settings of a device.
Using the local web UI
If you are not using the Digi Remote Manager or Digi aView portals, you can instead locally manage and configure your Digi device. The most common way of doing so is through the Digi device's local web UI.
Connect to the device using the default gateway IP address: 192.168.210.1
The default user for logging into the device will vary:
The default password is the unique password printed on the label packaged with your device.
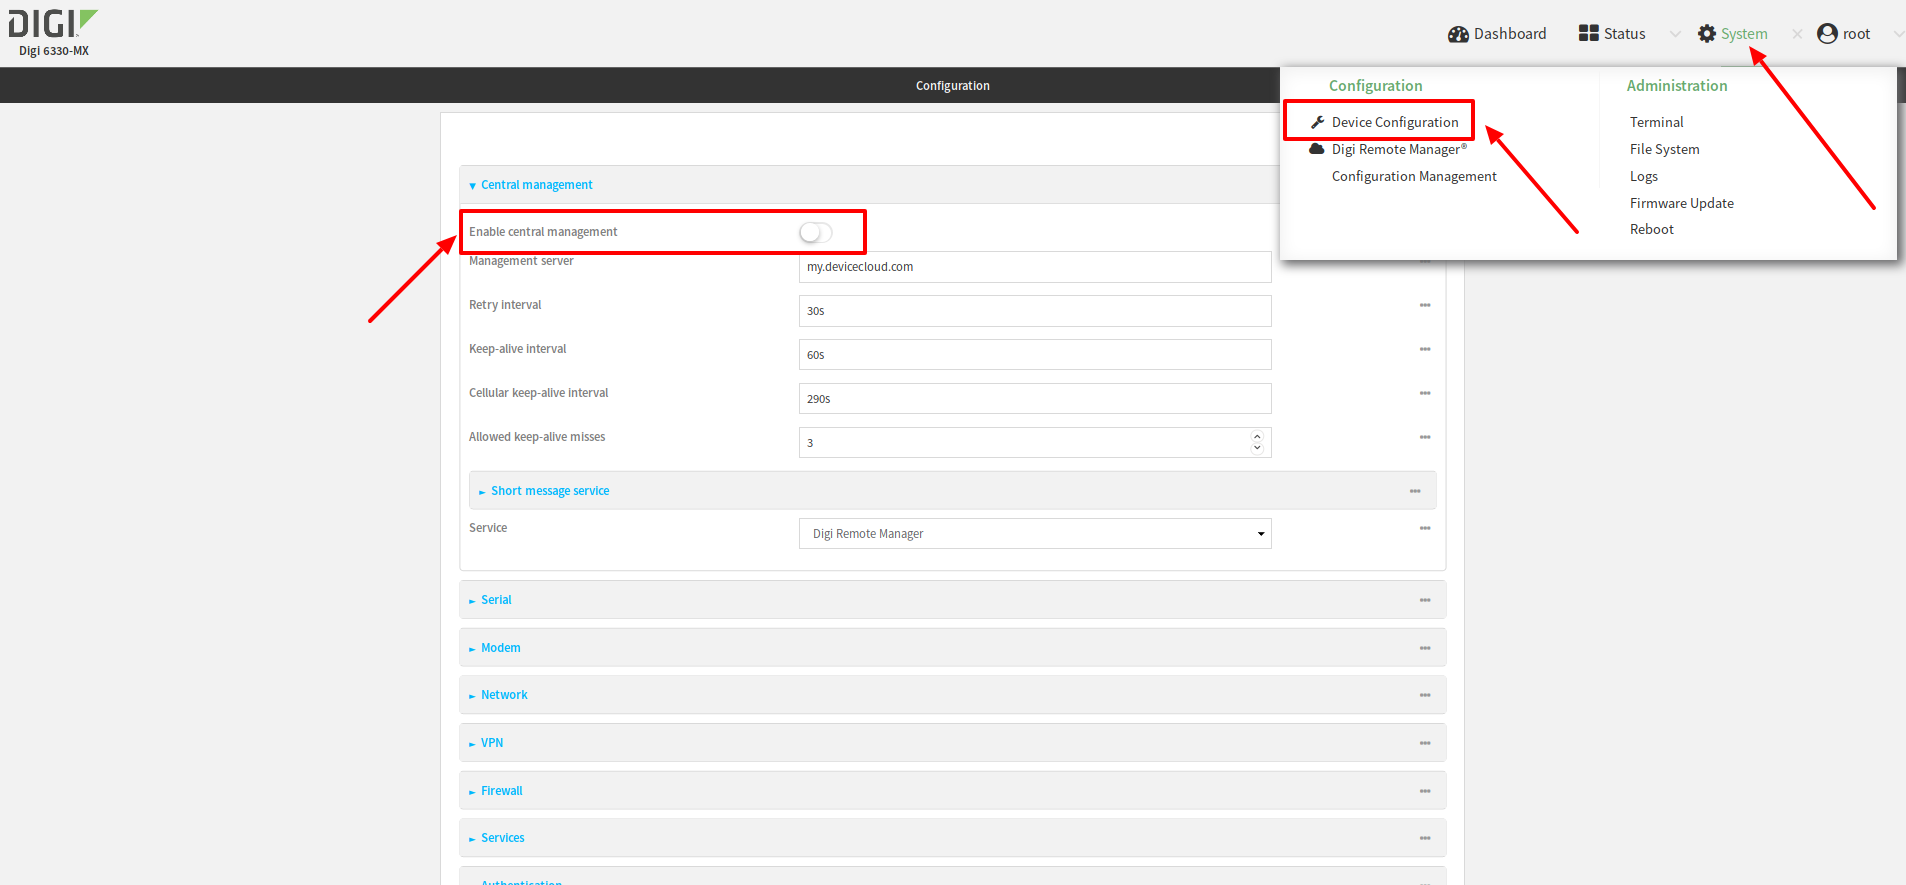
Once logged in via the local web interface, click on the Device Configuration link under the System drop-down menu. You may initially be shown a limited set of configuration options. Start by disabling central management of the device.
-
Un-check the box next to Enable central management.
-
(optional) If this is the first time the device has been configured, you msut also update the default user's password, under Authentication -> Users -> admin-> Password or Authentication -> Users -> root > Password.
Note: Passwords are case sensitive
-
Click Save.
After saving the profile, the device no longer attempts to sync with either the Digi Remote Manager or Digi aView portals, and a full range of available configuration options are visible. Click the question-mark next to the name of a configuration option to display a pop-up providing help details about that option, including any default values.
The local web UI offers the same configuration options as Digi Remote Manager or Digi aView, although changes made here will not sync with the cloud.
Using the Admin CLI
Users can access the command line interface of a Digi device using an SSH connection, telnet connection, or serial connection. External software, such as a Linux terminal, PuTTY, or TeraTerm is necessary to access the device through one of these mechanisms. If such software is unavailable to the user, Admin CLI access can still be gained by using a standard web browser (such as Google Chrome, Firefox, or IE) by navigating to the web UI and accessing the Terminal page, or through the Digi Remote Manager site by using the Console link. See the following link for more details on accessing the Admin CLI:
Accessing the Admin CLI
Once access to the Admin CLI is obtained, users can configure the device either through the Admin CLI prompt, or by running the config command from the prompt to enter into configuration mode on the CLI. Details on both interfaces of the Admin CLI are listed in the links below:
Execute configuration commands at the root Admin CLI prompt
Admin CLI configuration mode
Using the Shell Console
The shell console provides a standard Linux-style terminal for the Digi device. It is based on a busybox shell environment to provide a lightweight terminal with common Linux commands. Shell access is obtained through similar methods as described above for gaining Admin CLI access. However, shell access is not enabled by default in Digi devices, so a user must first enable shell access in the Digi device's configuration settings. Below is a link that details how to enable shell access.
Enabling Shell Access
Once enabled, the DAL shell console includes a config command developed by Digi that allows users to configure the Digi device. It is similar to the config command available through the Admin CLI. Below is the help text detailing the various options available for the config command in the shell console:
# config help

Usage: config <cmd> [arg...]


If not started:

eval $(config start)

config get <path>

config set <path> <val>

config dump [<path>]

config dump-public [<path>]

config json [<path>]

config map <name>


If started:

eval $(config stop)

config load

config load-json

config load-baked

config update

config create <file>

config try-create <file>

config validate

config commit [-f]

config cancel

config free

config get <path>

config set <path> <val>

config type <path>

config exists <path> <key>

config keys <path>

config count <path>

config new <path> [<key>]

config delete <path>

config find <path> [<name> <val>...]

config json [<path>]

config dump [<path>]

config dump-public [<path>]

#
In addition to the config command, the shell console also has the flatfsd command that can be used to either reboot or reset the Digi device.
# flatfsd -h
usage: flatfsd [-a|-b|-H|-P|-c|-r|-w|-i|-s|-v|-h|-?] [-n1234] [-d <dir>] [-f <file>]
-a <action> send a command to the running flatfsd
-b safely reboot the system
-H safely halt the system
-P safely power the system off
-c check that the saved flatfs is valid
-d <dir> with -r to read from flash to an alternate filesystem
and -s to save an alternate config to flash
-f <file> file or device node for flatfs storage
-r read from flash, write to config filesystem
-w read from default, write to config filesystem
-n with -r or -w, do not write to flash
-i initialise from default, reboot
-s save config filesystem to flash
-S save config filesystem to flash (rate limited)
-1 force use of version 1 flash layout
-2 force use of version 2 flash layout
-3 force use of version 3 flash layout
-4 force use of version 4 flash layout (default)
-v print version
-h this help
#
This can be used to quickly reset a Digi device back to firmware default settings:
flatfsd -i
Offline Configuration Storage
The configuration settings on a Digi device can be downloaded from its web UI for offline storage. This configuration file can also be loaded onto additional Digi devices as a local method for applying the same configuration settings to multiple devices.
To download the configuration file from the Digi device, login to the device's web UI, then select the Configuration Management option under the System drop-down. Refer to instructions in the Using the local web UI section above for details on how to access the web UI of the Digi device.
Next select the Save button to download the configuration settings from the Digi device. An option passphrase can be provided to encrypt the configuration file.
.png?lang=en-us)
This configuration file can be restored at any point by logging into the web UI, navigating to the Configuration Management page, browsing for the file, and then clicking the Restore button. Note that if a passphrase was entered when the configuration file was originally saved and downloaded from the device, the same passphrase must be entered when restoring the configuration.
Reminder
These offline configuration files are device-model specific and cannot be applied if the product model does not match. For example, a configuration file downloaded from a 6330-MX device can only be applied to other 6330-MX devices, not any other model of Digi device (e.g. EX15, Connect IT 4, etc.)
Summary
The above sections detailed the various methods for applying configuration settings to a Digi device. If you have any questions, please contact Digi support, or browse our Digi knowledgebase and product user guides for additional documentation.
Last updated:
Sep 30, 2025